Connect & Integrate Cloudflare
Last updated: June 27, 2025
At time of writing, this integration is in the process of being added to the YeshID integration catalog. Once the integration is in there, you will be able to select catalog and will only need to provide your API token, and Account ID.
Steps
Add Cloudflare as an application in YeshID. See:
Create an API token by following: https://developers.cloudflare.com/fundamentals/api/get-started/create-token/
Ensure that
Account.Account Settingsscopes are granted: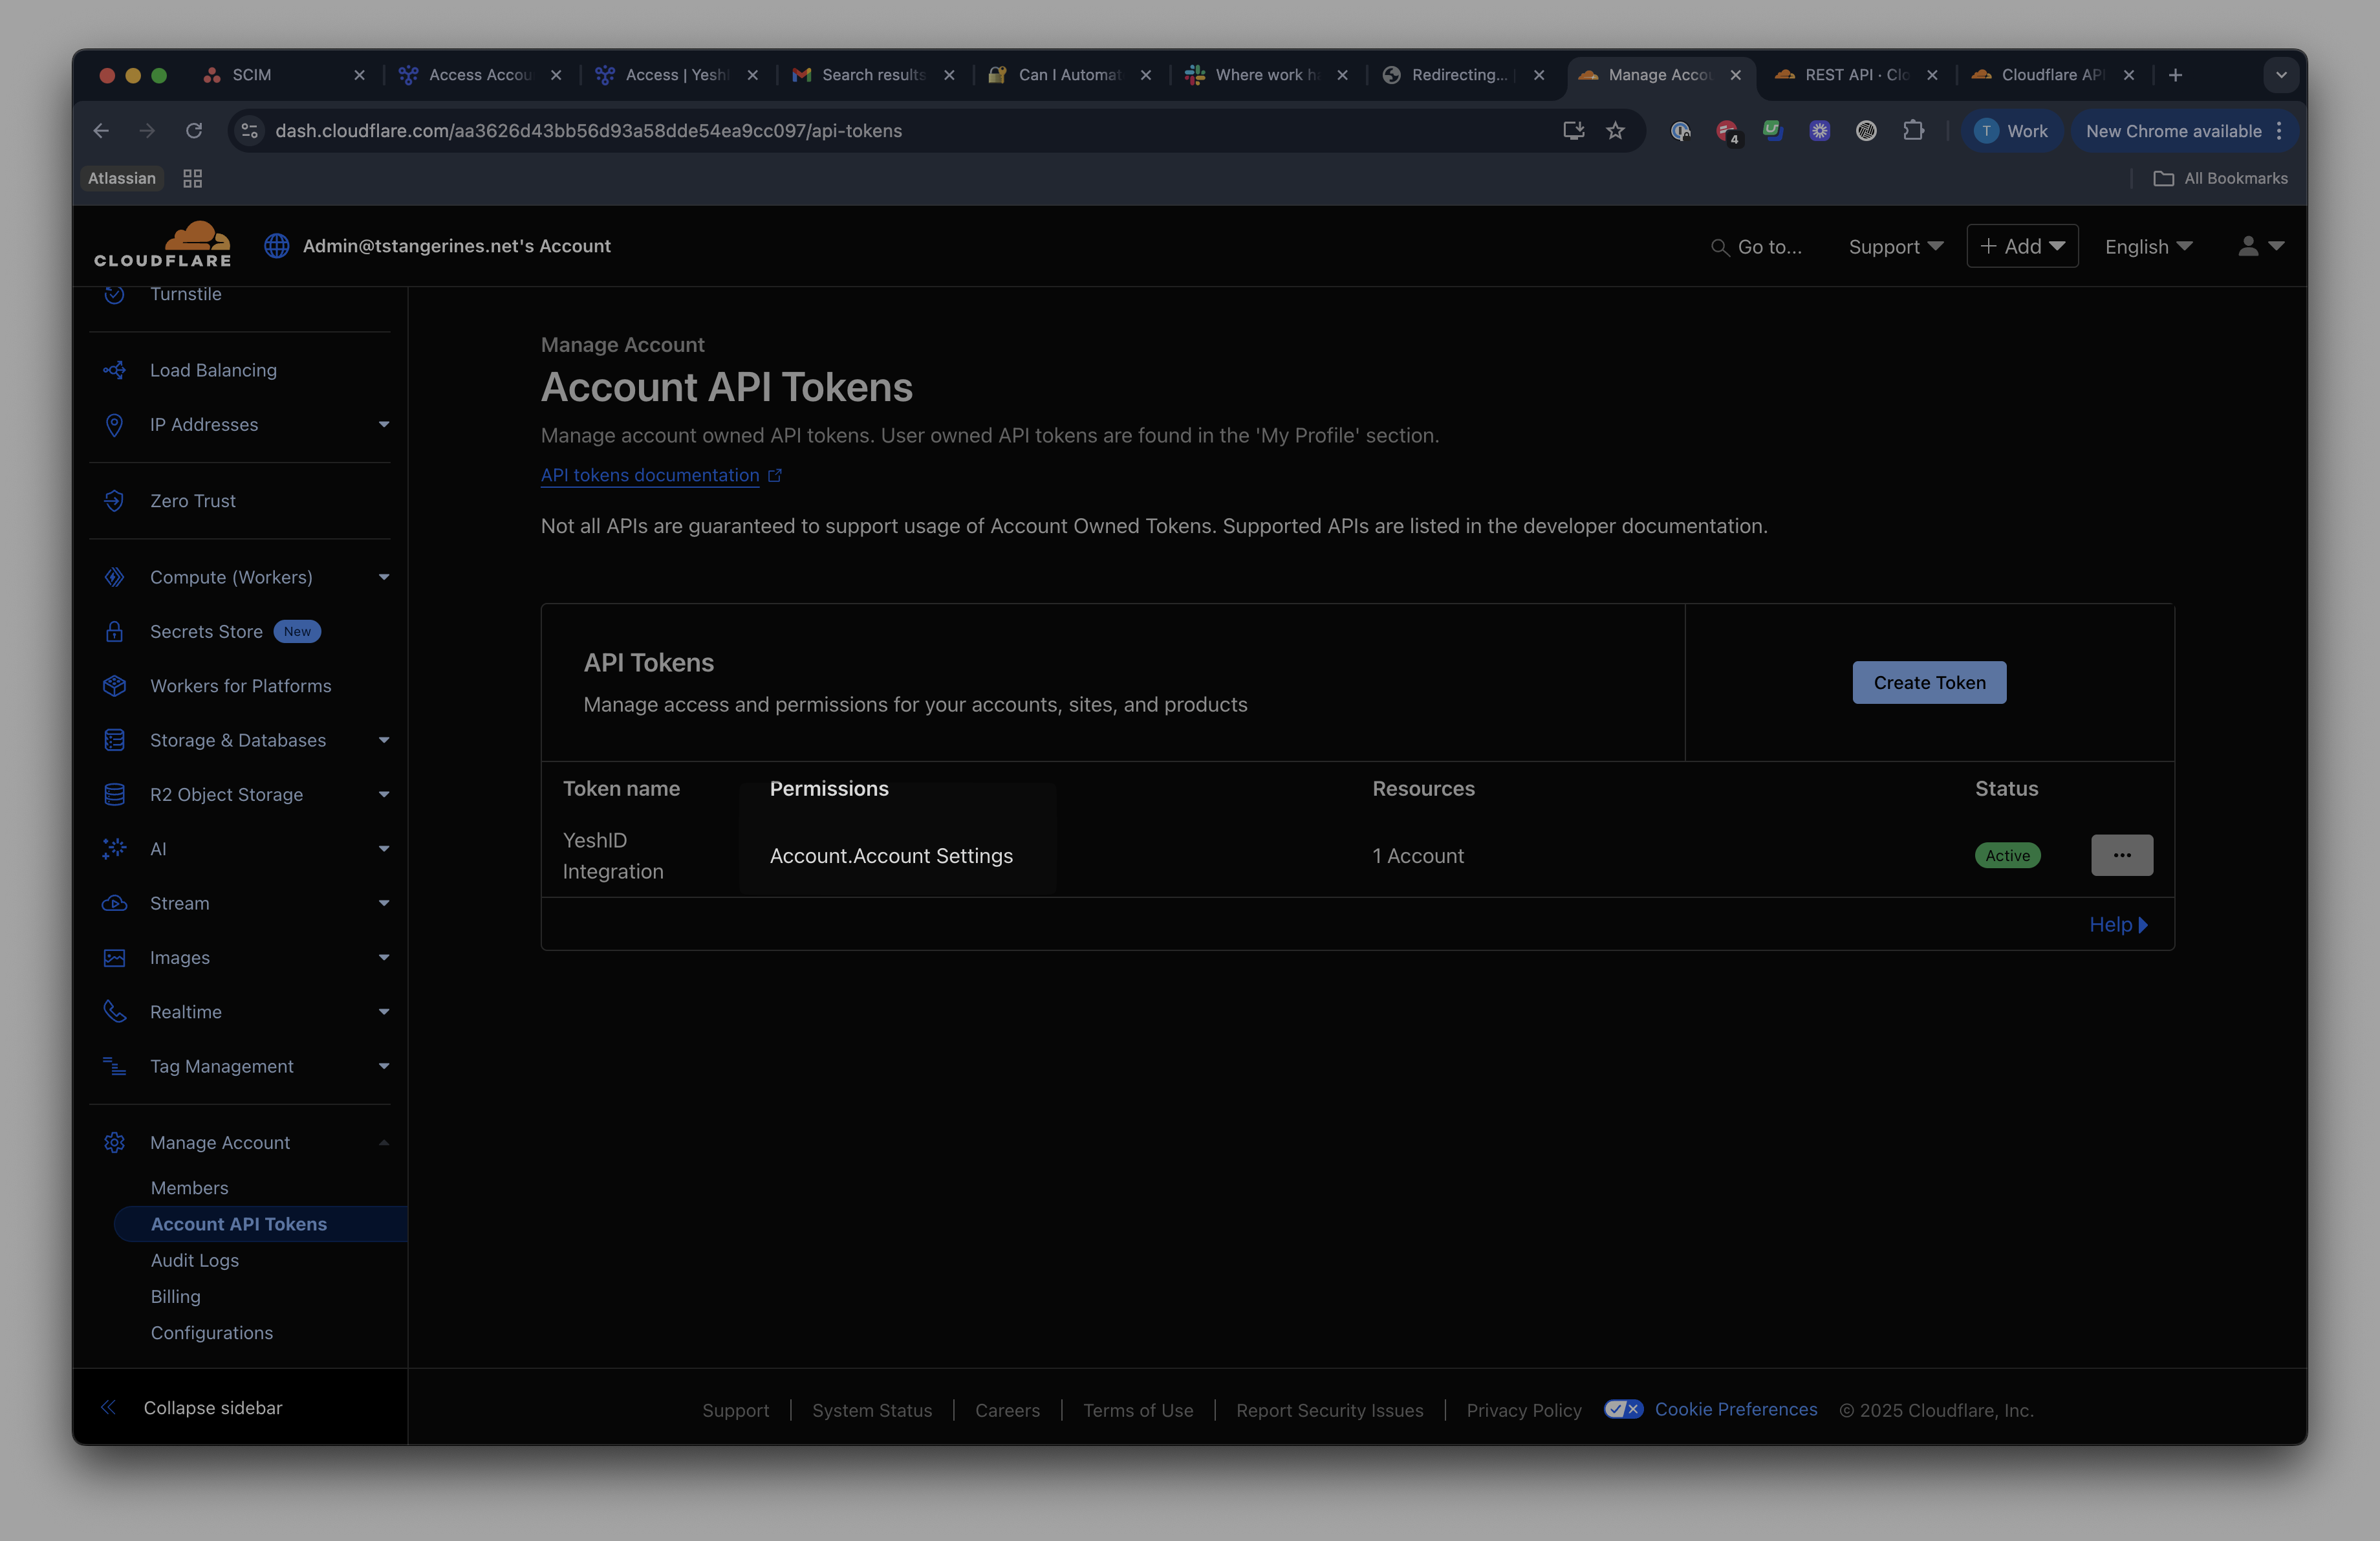
Get your
Account ID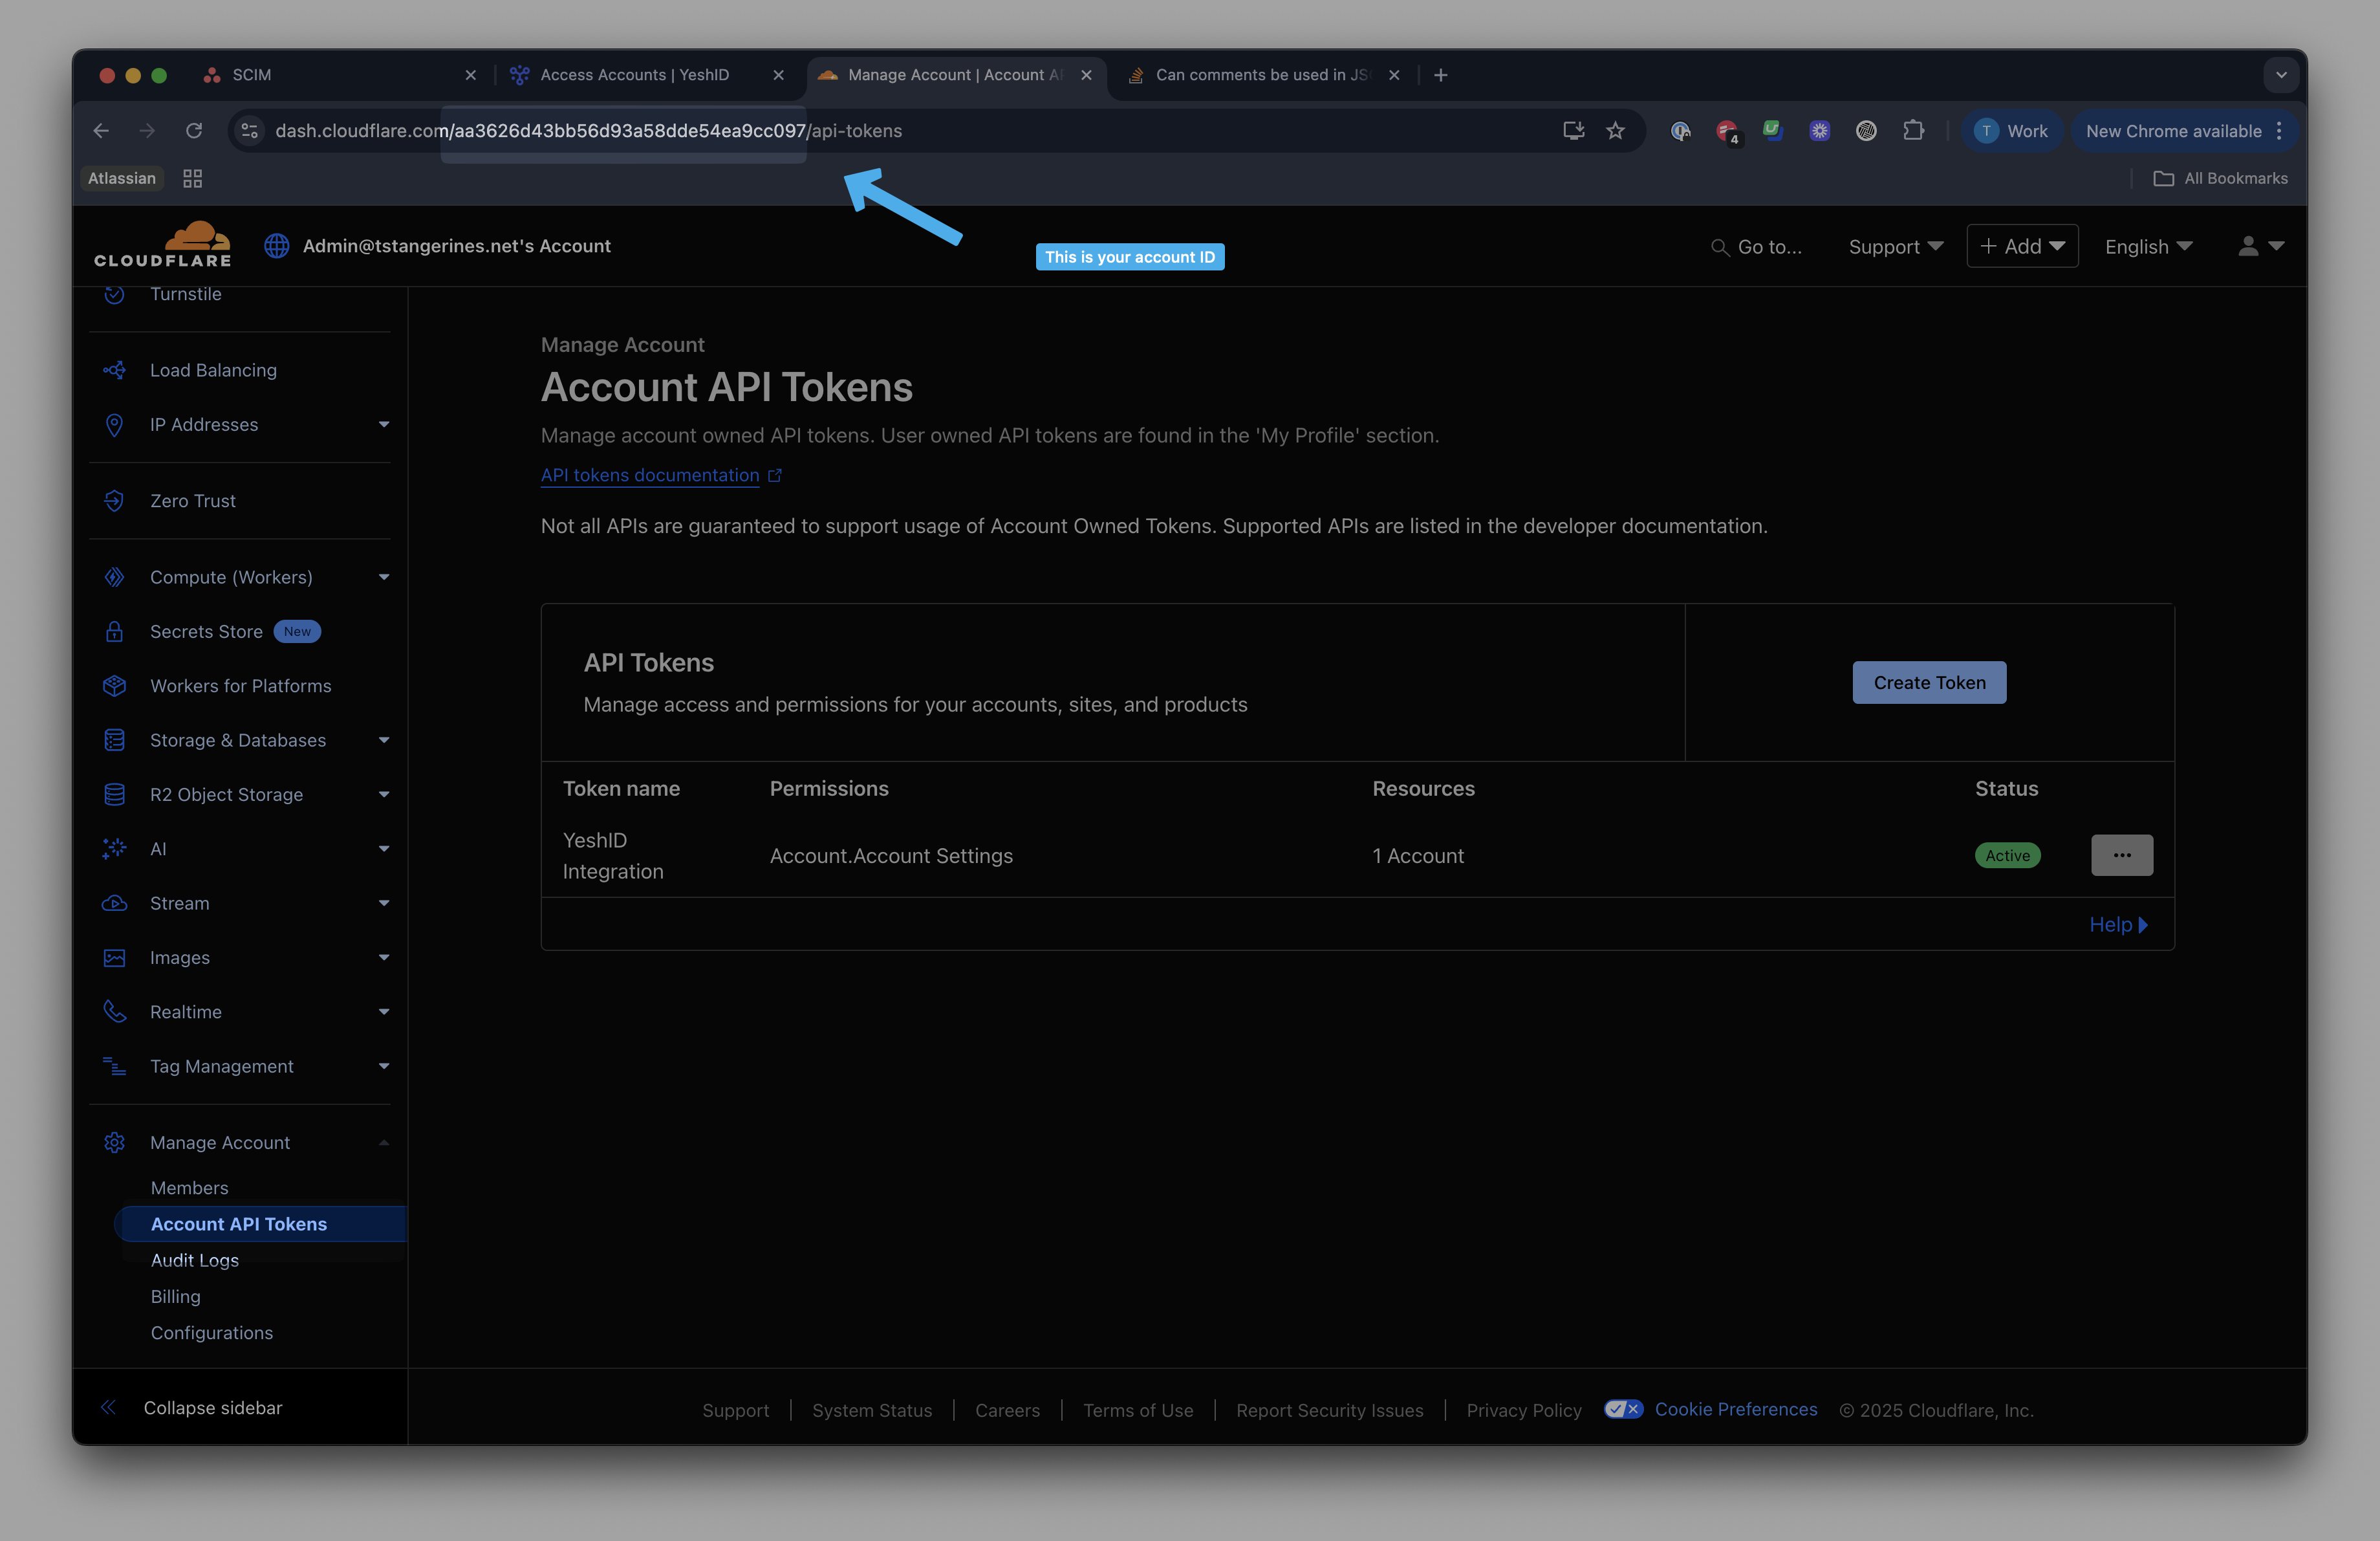
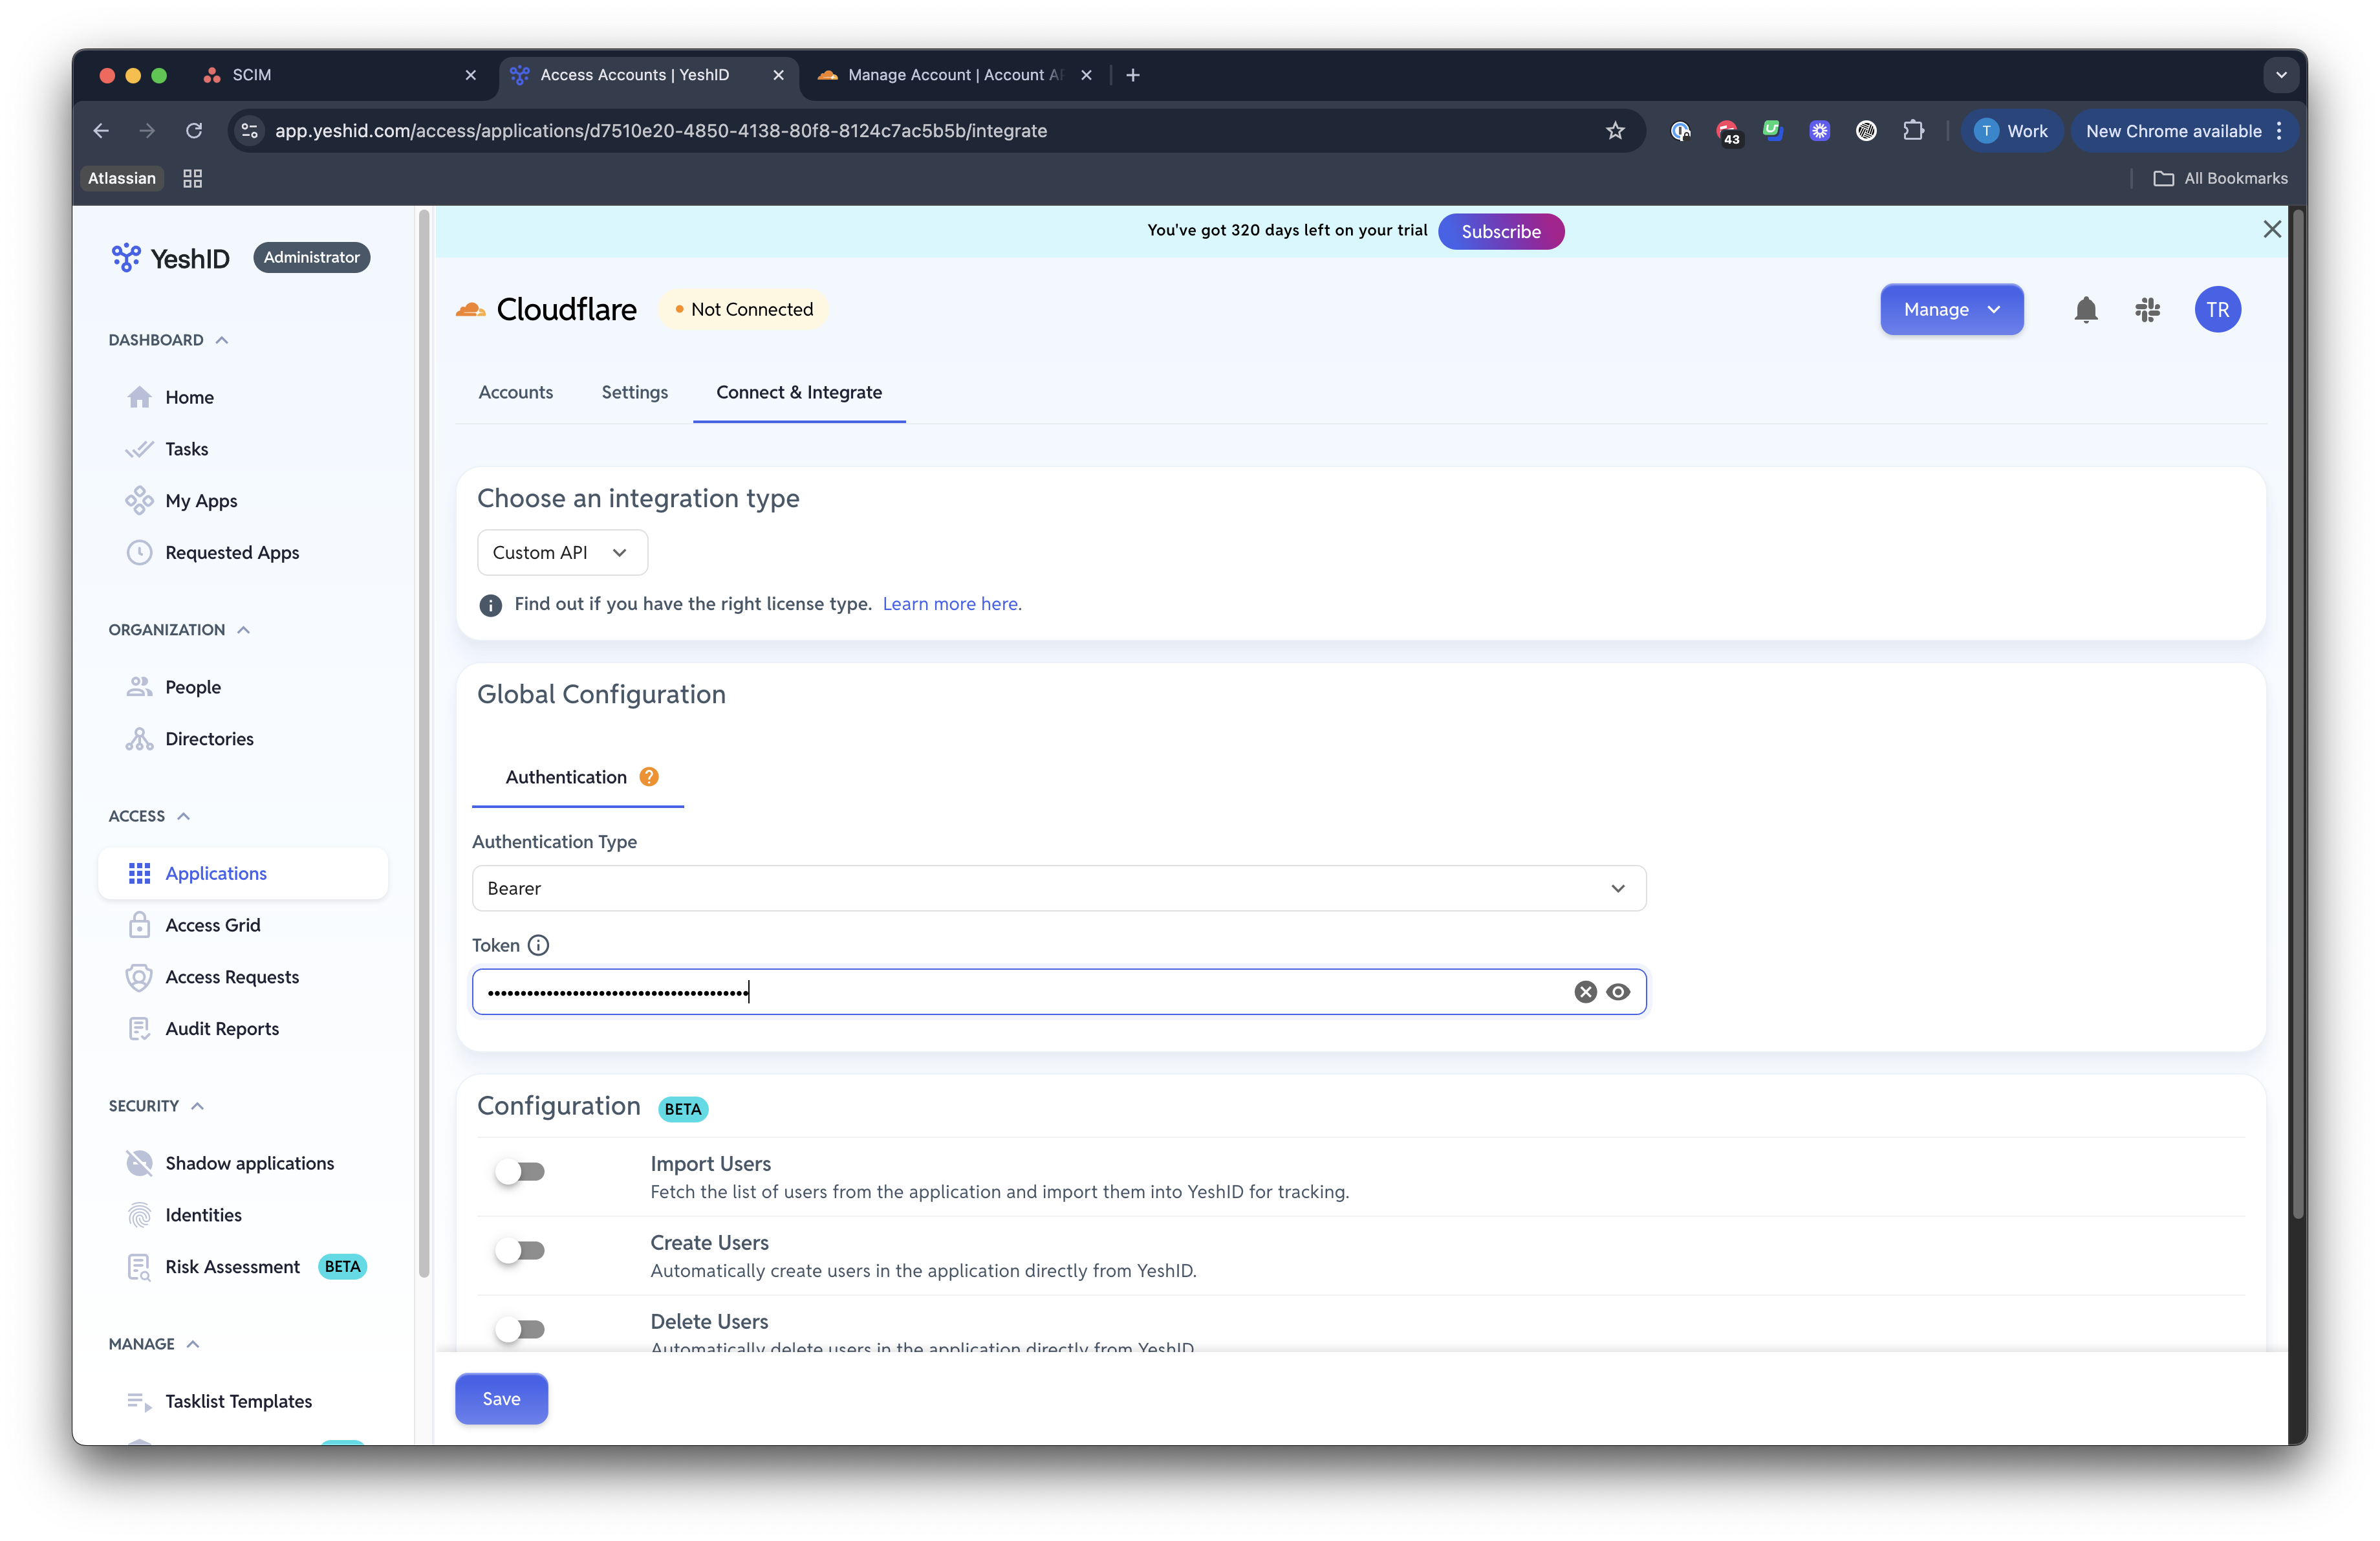
In YeshID, head to your Cloudflare app and click "Connect & Integrate"
Select integration type Custom API
Include your API TOKEN created in the previous step
Import Users
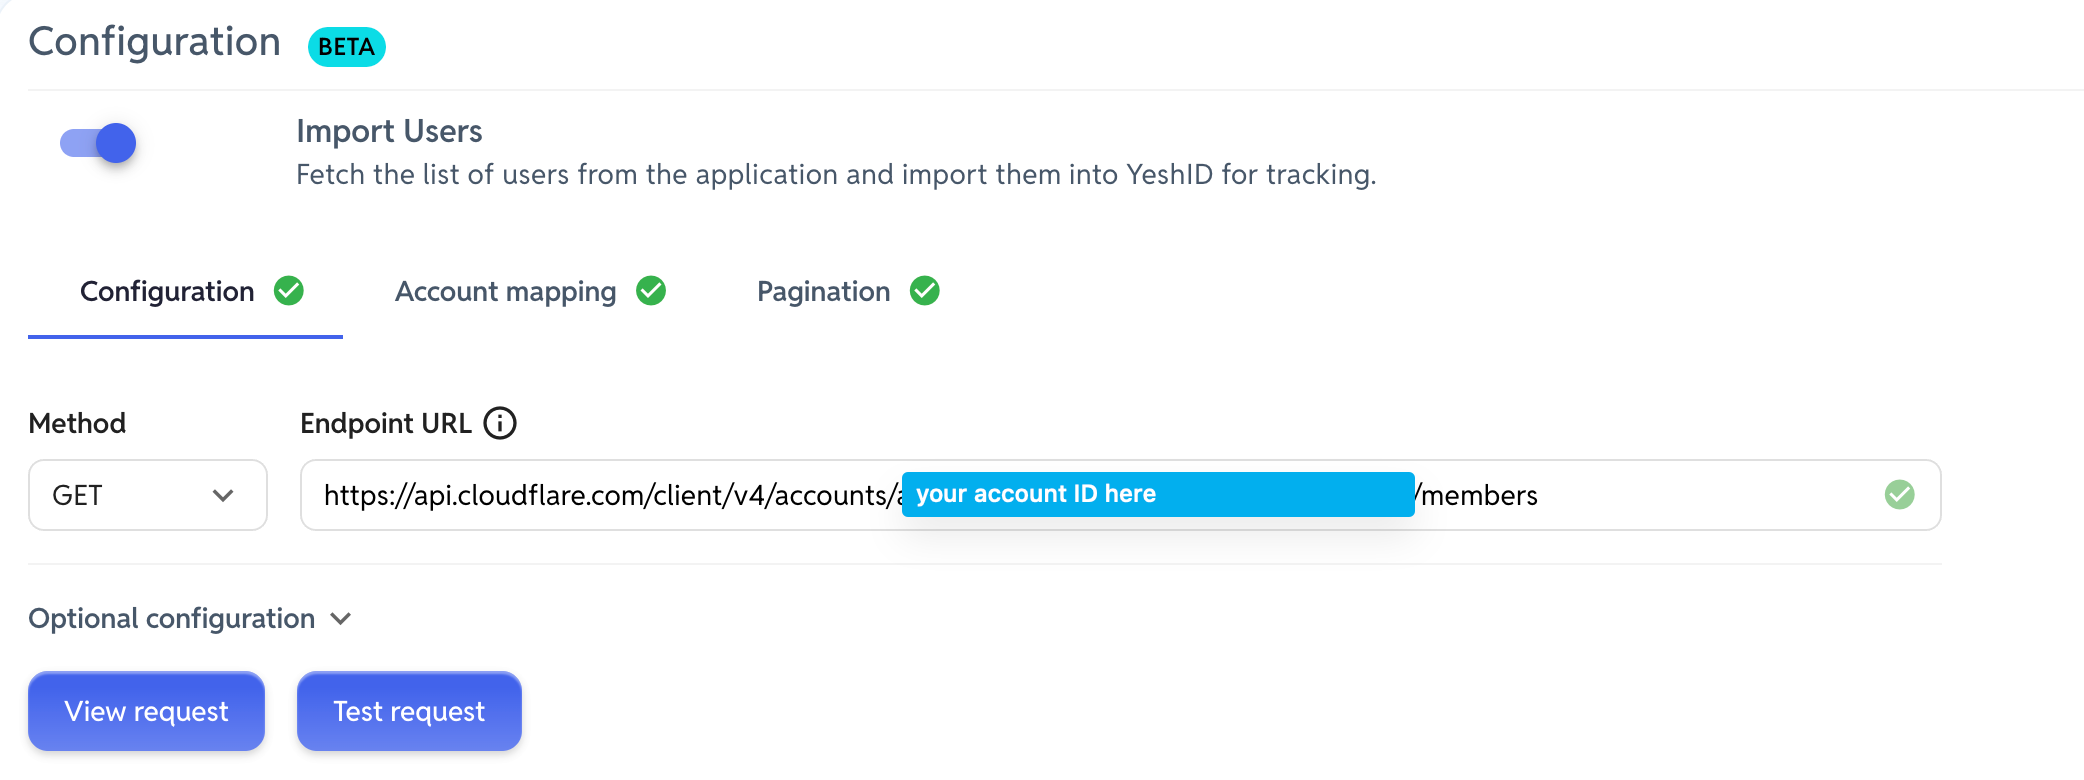
Endpoint URL:
https://api.cloudflare.com/client/v4/accounts/<your_account_id>/members
Create Users
Note that the role in this screenshot is corresponds to the Minimal Access Role
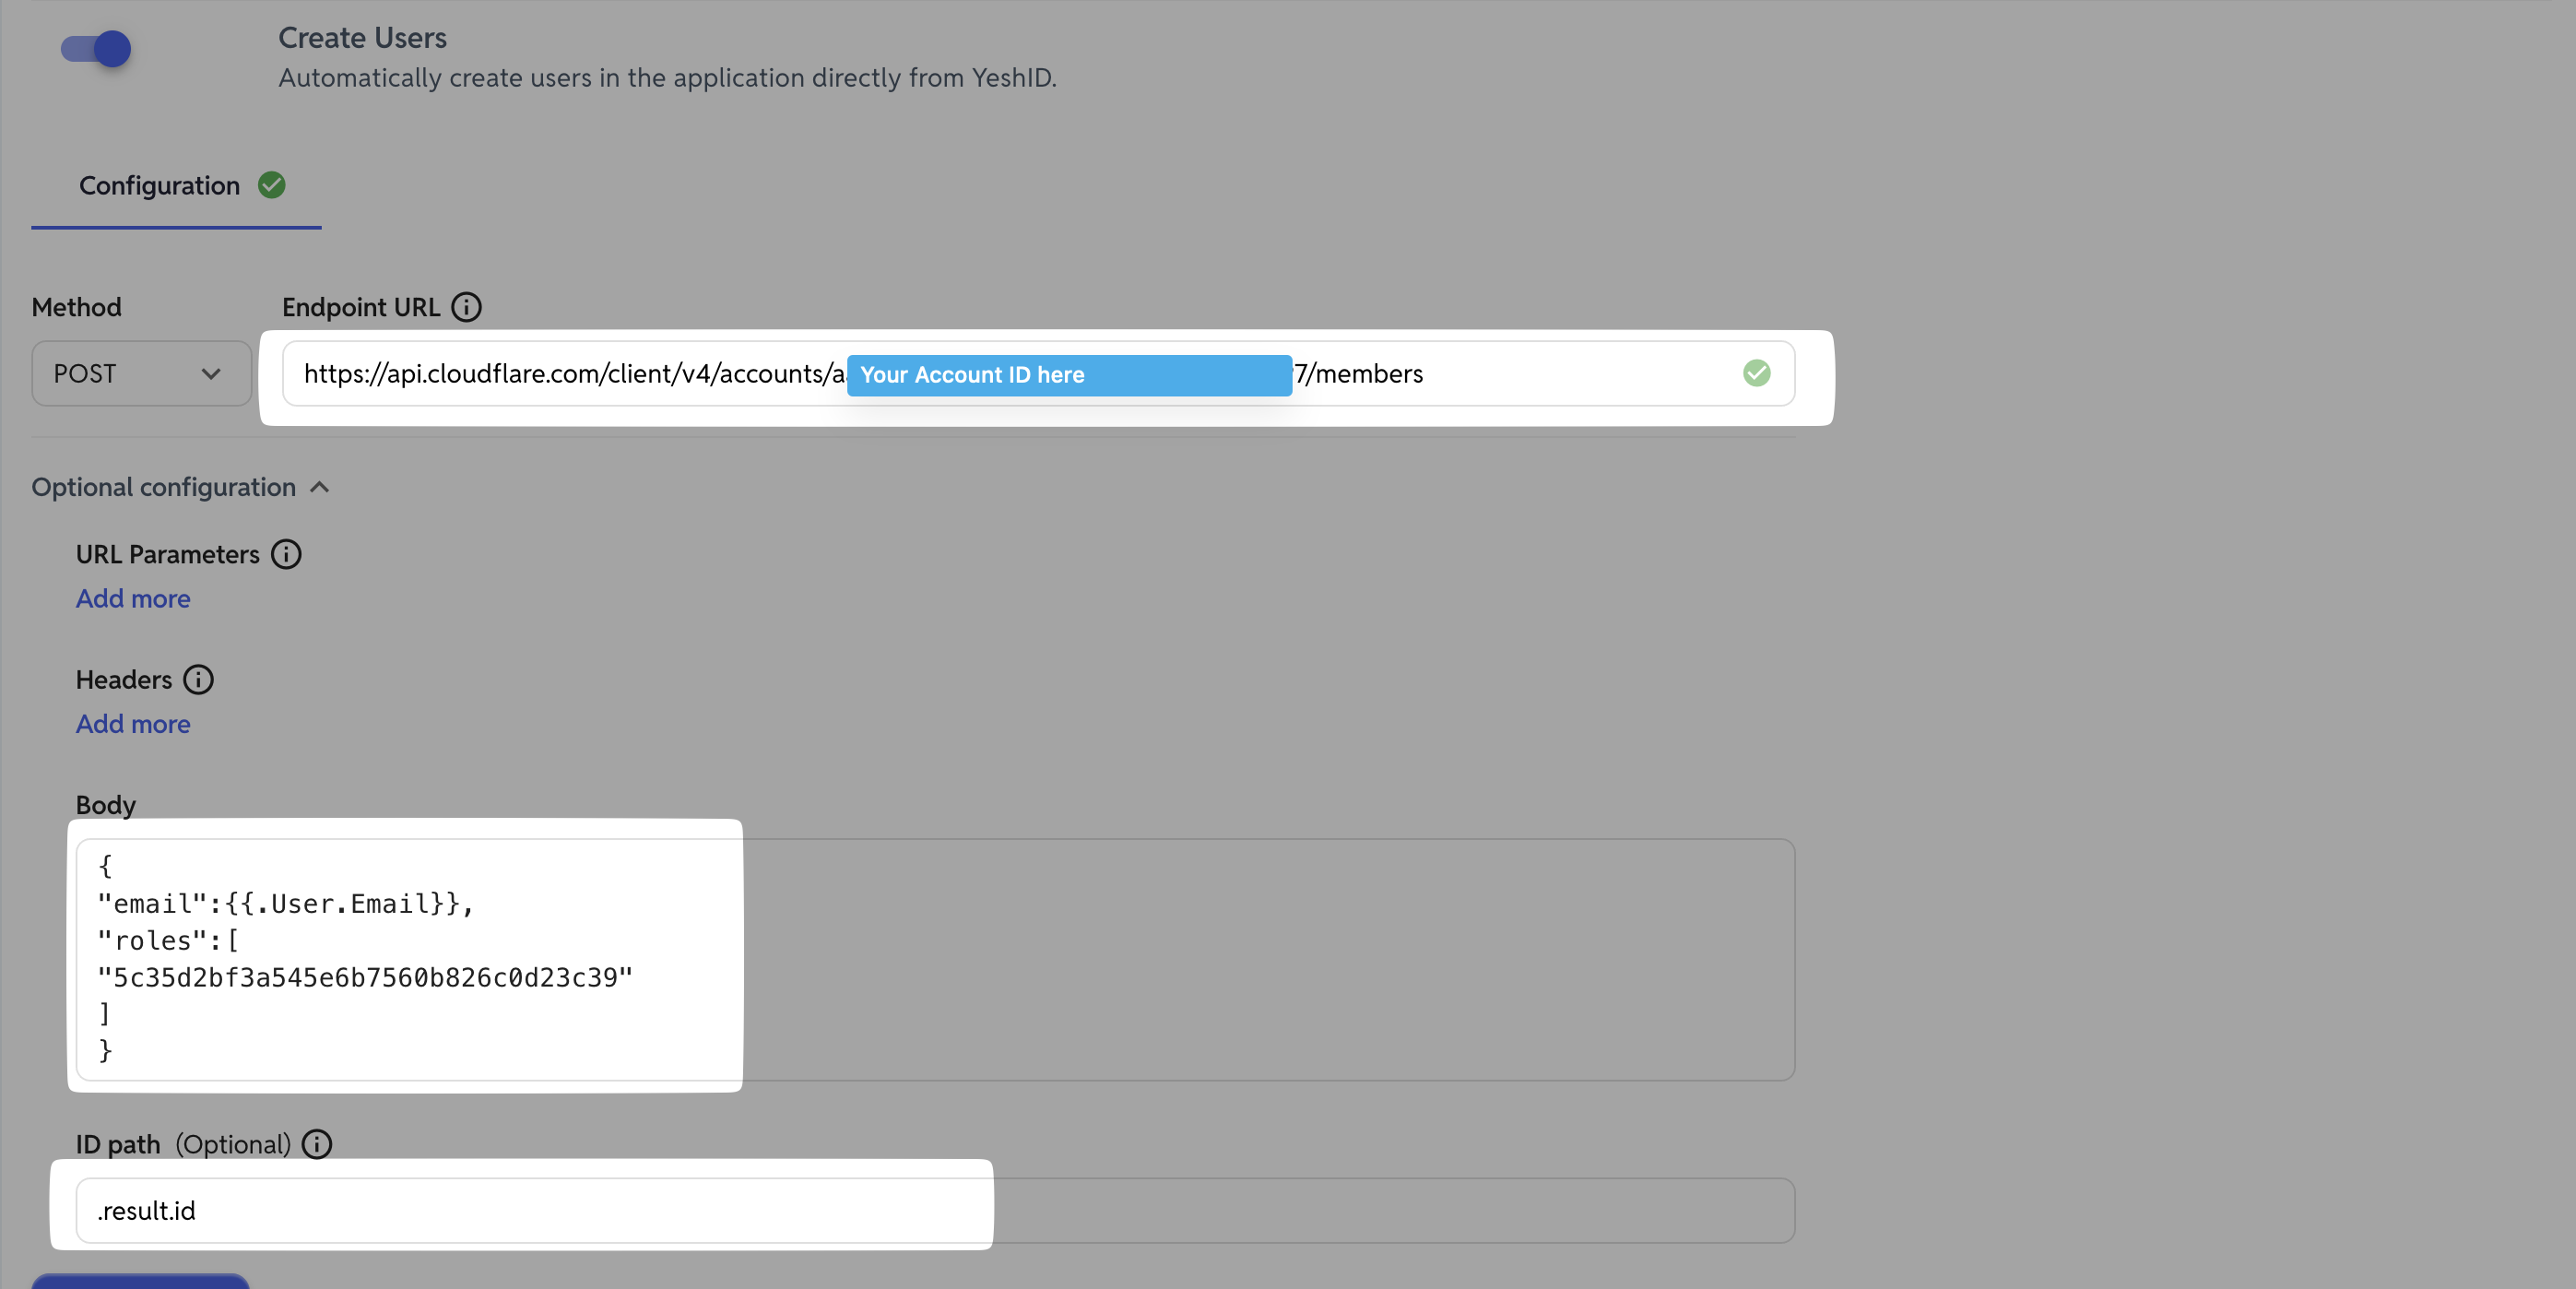
Method
POSTEndpoint URL:
https://api.cloudflare.com/client/v4/accounts/<your_account_id>/membersBody:
{
  "email":{{.User.Email}},
  "roles": [
    "5c35d2bf3a545e6b7560b826c0d23c39"
  ]
}
ID Path
.result.id
Delete Users
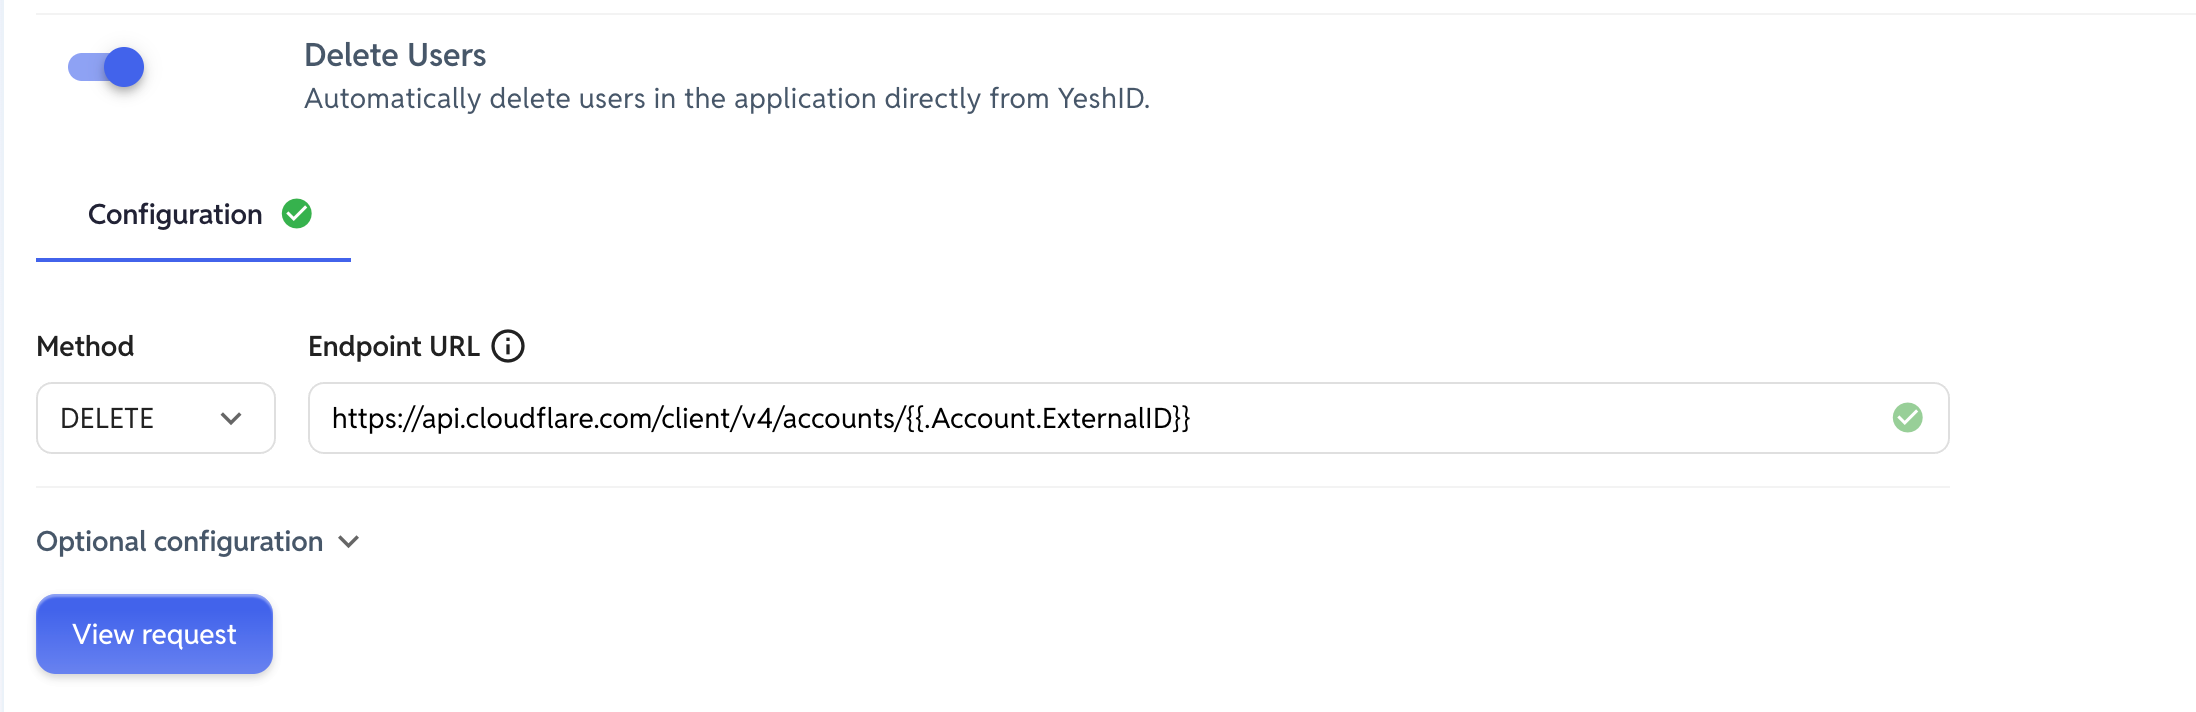
Method
DELETEEndpoint URL:
https://api.cloudflare.com/client/v4/accounts/<your_account_id>/members