Connecting to Bob (HiBob)
Last updated: July 21, 2026
This guide shows how to connect Bob (HiBob) as an HRIS in YeshID, and the specific steps within Bob. For an overview of how HRIS syncing works in YeshID — people sources, mappings, and create rules — see HRIS with YeshID.
Step 1: Create a service user in Bob
Sign in to Bob as an administrator.
Navigate to Settings > Integrations > Automation > Service Users.
Click New service user and give it a recognizable name, such as
YeshID.Copy the Service User ID and Token and store them somewhere safe.
Note: Bob shows the token only once, when the service user is created. If you lose it, you will need to regenerate it.
Step 2: Grant the service user permissions
New service users have no access to employee data until they are added to a permission group.
In Bob, navigate to Settings > Account > Permission groups and create a new group (for example,
YeshID Integration).Add the service user you created in Step 1 as a group member.
Under Access data for, select employees by condition and remove the Lifecycle status equals Employed condition. This ensures terminated employees and upcoming starters are included, so YeshID can schedule onboarding before day one and see end dates for offboarding.
Under People’s data, grant View all employees’ access to the following sections:
Basic info
Work
Lifecycle
Save the permission group.
Bob silently omits any field the service user is not permitted to read — the request still succeeds, the data is just missing. If employees import without names, titles, or end dates, check the permission group’s section access first.
Step 3: Connect Bob in YeshID
In YeshID, navigate to Applications -> Add Application and add Bob.
Click Connect.
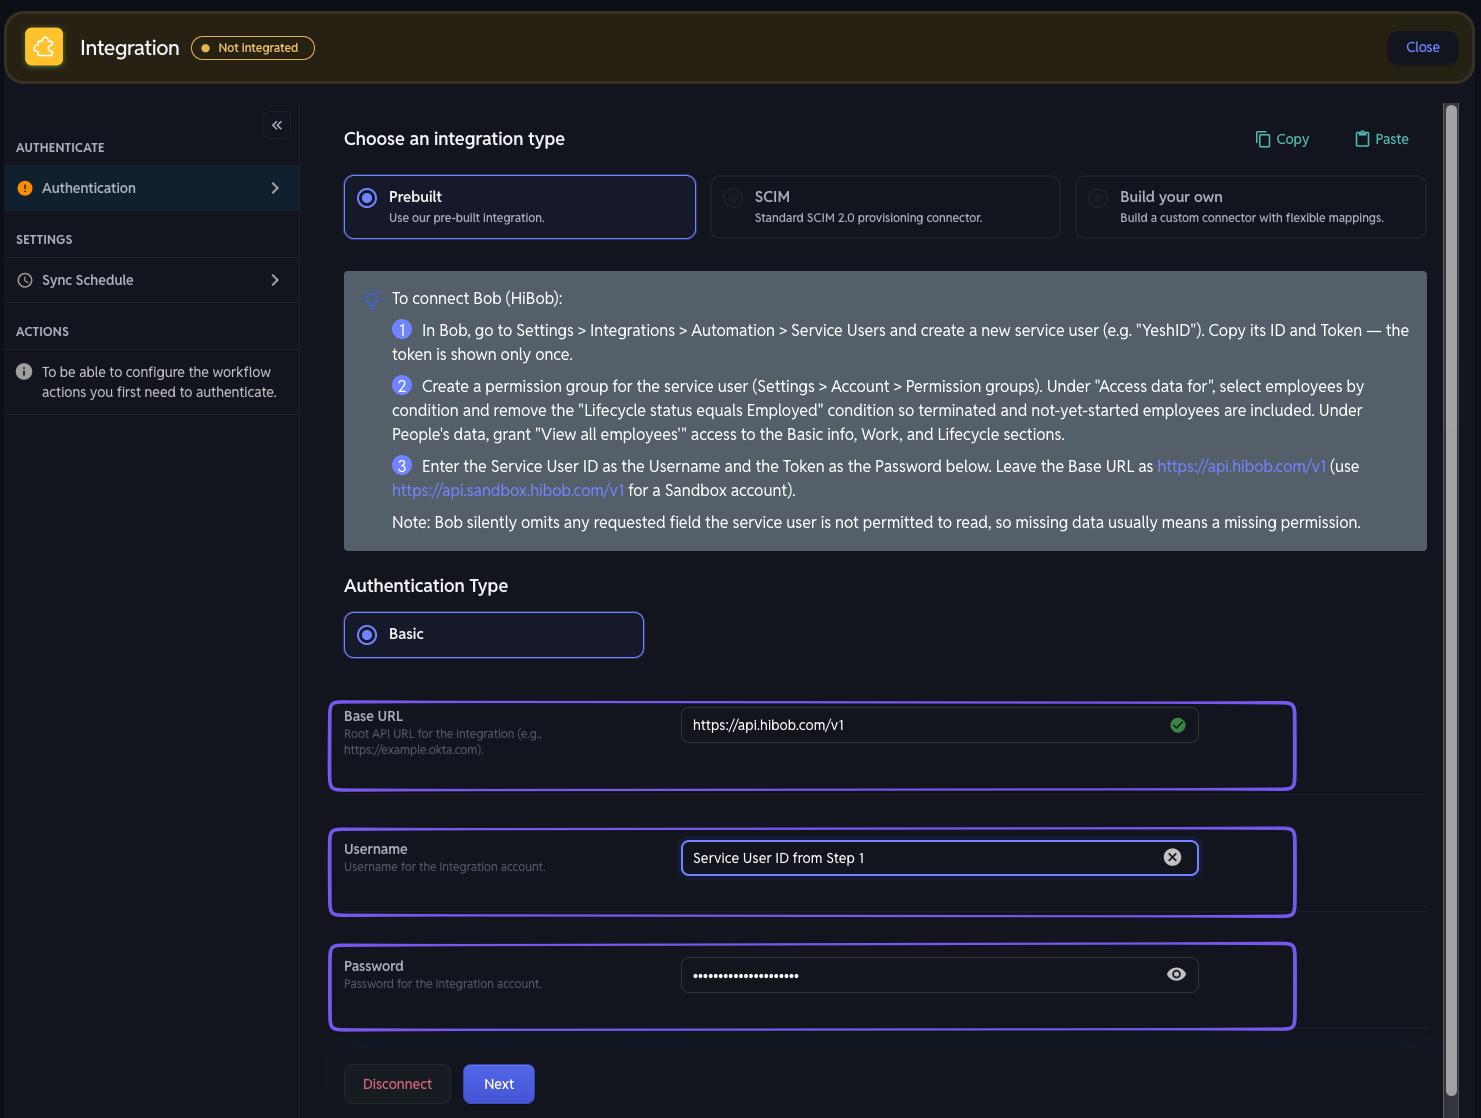
Fill in the configuration form:
Base URL — leave the default
https://api.hibob.com/v1. Usehttps://api.sandbox.hibob.com/v1only if you are connecting a Bob Sandbox account.Username — the Service User ID from Step 1.
Password — the service user’s Token from Step 1 and click Next
Active Employees Only — when set to Yes, terminated employees are excluded from imports. Current employees and upcoming starters (lifecycle status Hired) are always included.
Step 4: Test the import and review mappings
Under Import & Mapping, click Test. YeshID fetches employees from Bob and displays the results (the preview shows up to the first 500 employees).
Review the field mappings and adjust them if needed.
Click Save.
YeshID imports the following fields from Bob:
YeshID field | Bob source |
|---|---|
First name | First name (Basic info) |
Last name | Surname (Basic info) |
Display name | Display name (Basic info) |
Email (Basic info) | |
Start date | Start date (Work) |
End date | Termination date (Lifecycle) |
Title | Job title (Work) |
Department | Department (Work) |
Site | Site (Work) |
Status | Status (Lifecycle) |
Lifecycle status | Lifecycle status (Lifecycle) |
Manager | Reports to (Work) |
By default, the create rule is set to create a YeshID person for every employee whose lifecycle status is not Terminated — including upcoming starters. You can edit this rule in the import wizard.
Notes
Syncing is polling-based, not instant. Changes in Bob appear in YeshID after the next scheduled sync.
If the connection fails with a 401 error, re-check the Service User ID and Token. A 403 error means the service user’s permission group does not allow reading employees — revisit Step 2.
If terminated employees import without an end date, the service user is likely missing access to the Lifecycle section — revisit Step 2.