Connecting Your Applications
Last updated: July 9, 2026
If your application has a REST API & if you have the right subscription, YeshID can connect with your applications to help you orchestrate lifecycle actions 👍
Connecting your applications enables YeshID to help with orchestrating and managing your IAM related operations.
For example: Enabling Import Users keeps your Access Grid up to date, which is also what enables the (1) /remove user from all applications task during off-boarding workflows and (2) easily presents you an up-to-date snapshot of application users during an Application Audit. For a full mapping of how Integration Actions enable YeshID operations, see the Integration Actions & Enablement Table below.
Integration Actions & Enablement Table
Action | What It's Used For | What It Enables |
Import Users | Periodically syncing with your users. |
|
Create User | Creating a user account within an application. | Automating the |
Activate User | Activating an existing account in an application. | Allows staggered / precise control over onboarding flows (i.e. Create the user account but don't activate until a specific time). |
Delete User | Removing an account in an application | Automates the |
Deactivate User | Deactivating an existing account in an application. | Deactivating a user instead of deleting them (if accounts need to be preserved for archiving or business purposes) |
There are 4 steps to integrating or Connecting your Applications
Choosing your Integration Type
Configuring Authentication
Configuring (and enabling) your Actions
Choosing your Integration Type
In YeshID, there are 3 ways to integrate or connect with your applications.
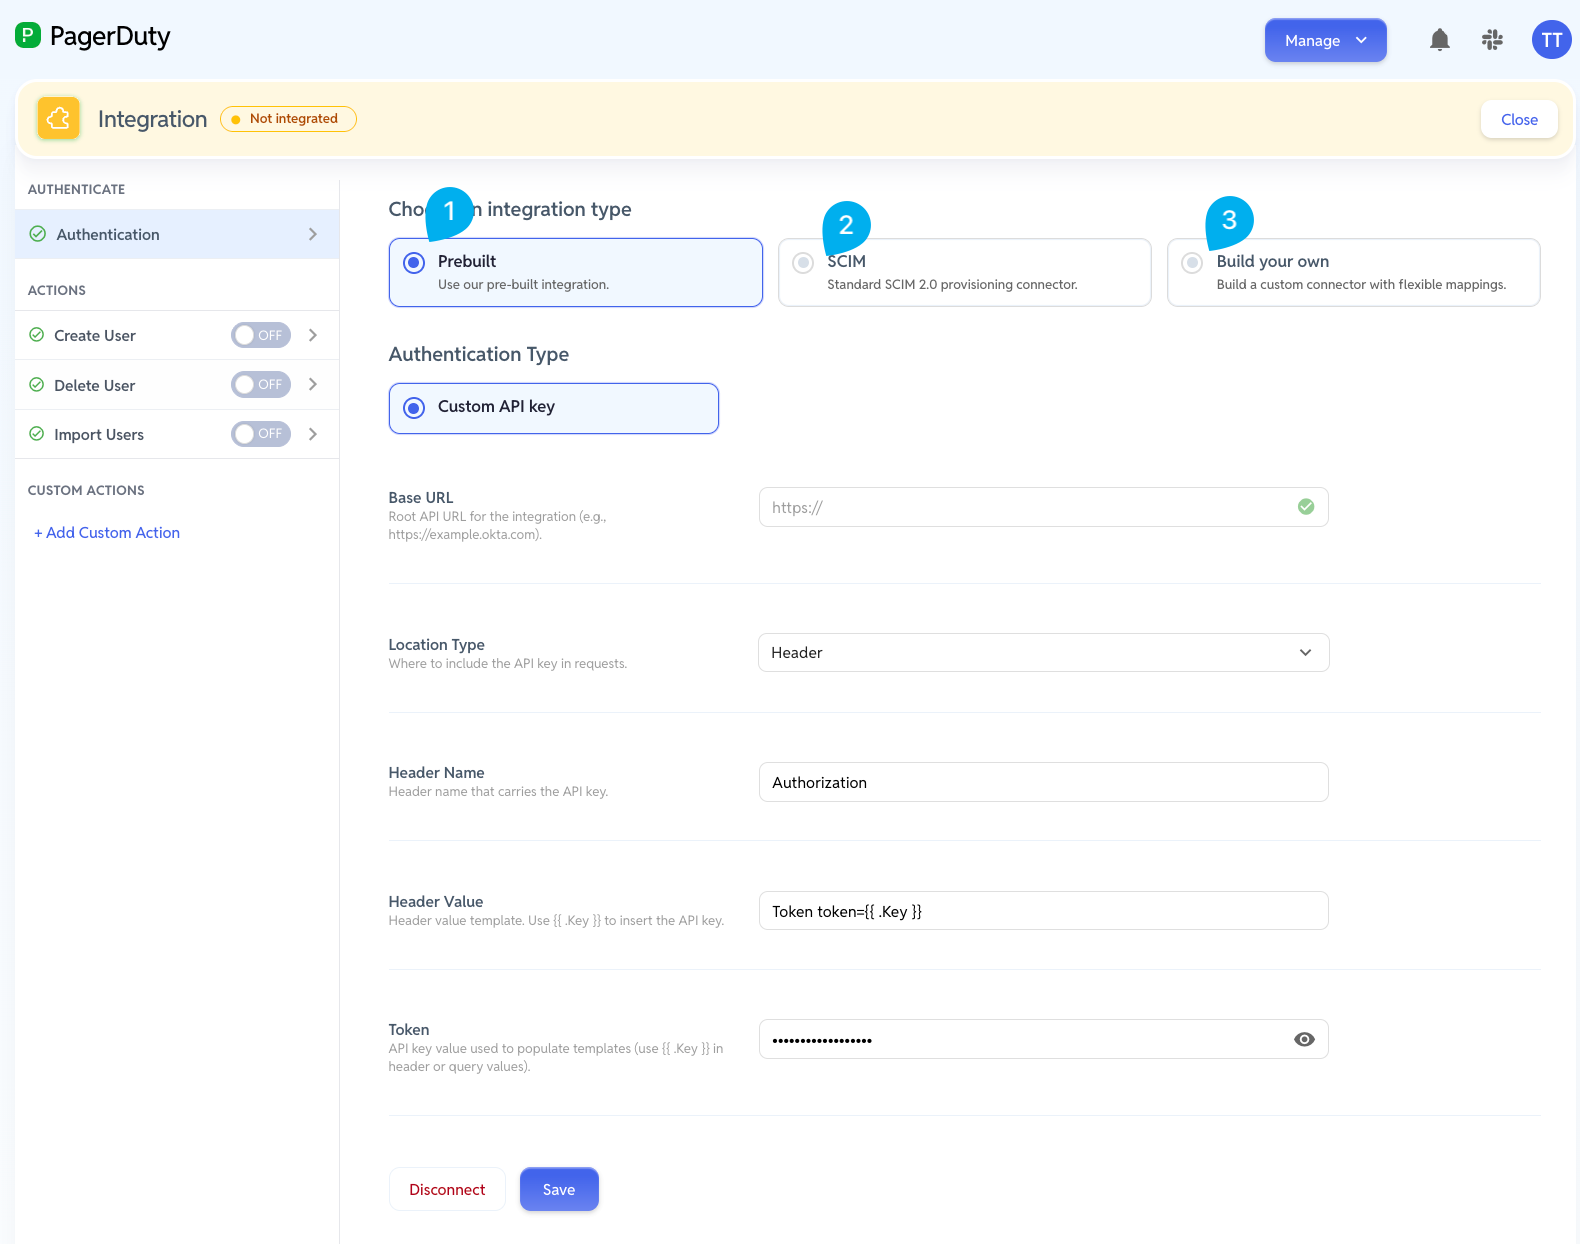
1. Prebuilt Integrations
Prebuilt integrations are integrations that have been researched and created by YeshID.
Because these integrations have been validated by YeshID, you only need to specify (1) the authentication details and (2) enable the actions that are known to be supported by this Application at time of development.
Notice an error or something out of date with a prebuilt integration? Please reach out to us at support@yeshid.com 🤝
2. SCIM Integrations
SCIM (System for Cross-domain Identity Management) integrations that follow RFC7644 with standardized endpoints, attributes and operations.
The benefit of SCIM is standardization where (all basic operations(CRUD) are supported and use the same naming and endpoint structure):
Therefore, you only need to configure:
Your app/tenant's specific SCIM Endpoint URL
Which actions you'd like to enable.
These types of integrations sometimes require that you have the right plan and package within your apps. For example, at time of writing, Slack requires the Enterprise Grid plan to use SCIM.
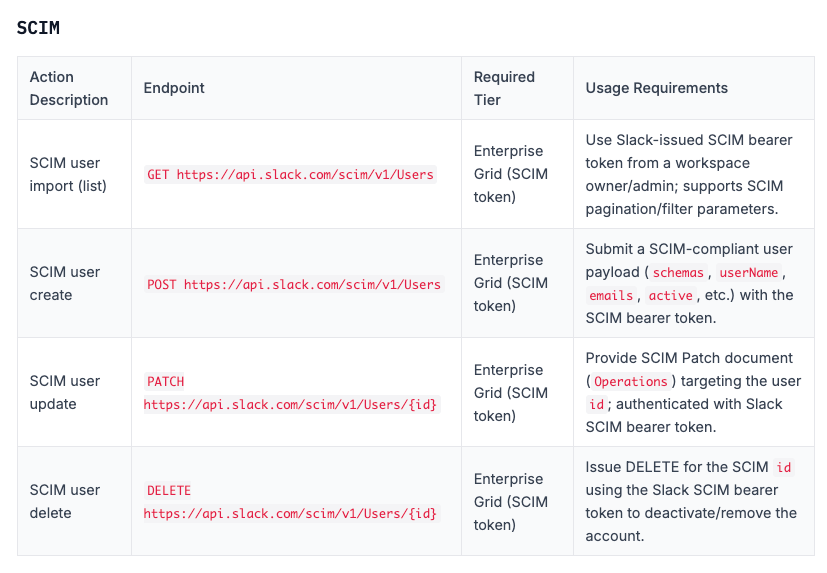
See: ssotax.yeshid.com for more information.
3. Build Your Own Integrations
This is the fall-back option to support applications that may not be known to YeshID, and may not support SCIM. Use this when:
You know what authentication mechanism is required for your app
You know the endpoints required to perform required operations (CRUD).
Setting up your Authentication Settings
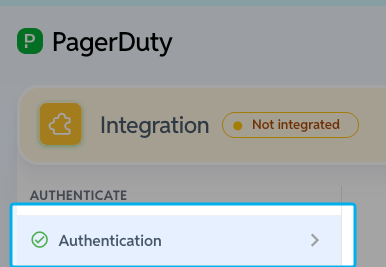
Authentication (AuthN) is how YeshID will communicate your app to execute the required actions. Once Authentication is set-up, that mechanism (token) is used for every subsequent action (i.e. List Users, Create User, Delete User).
YeshID currently supports 5 Authentication Types:
Bearer Authentication
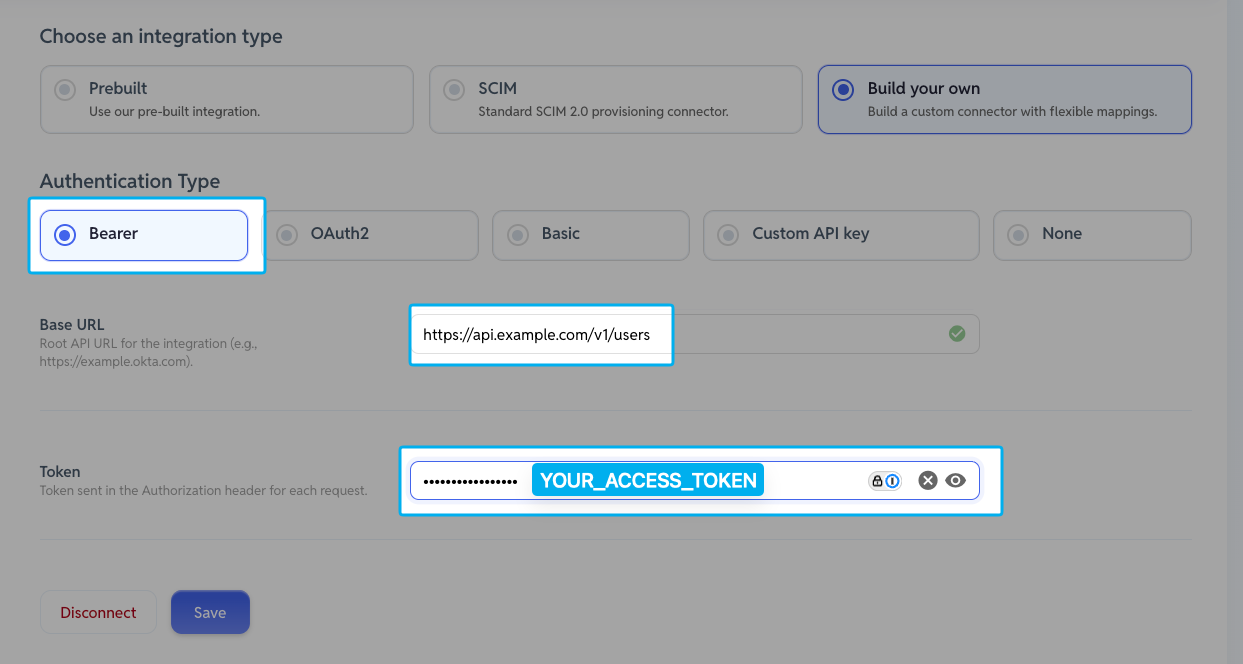
Bearer authentication (often called Bearer token auth) is a common way to secure APIs using a token instead of a username/password. The client sends a token in the HTTP Authorization header, and the server trusts the request if the token is valid.
Use this method of your API documentation specifies adding in a "Bearer" token, similar to:
curl https://api.example.com/v1/users \
  -H "Authorization: Bearer YOUR_ACCESS_TOKEN" \
  -H "Content-Type: application/json"
Whatever is added into "Token" will be inserted into YOUR_ACCESS_TOKEN
OAuth2 Authentication
OAuth 2.0 is an authorization framework that allows an application to obtain limited access to a user's resources on another service without sharing the user's password.
There are 3 sub-types that may be utilized for OAuth2:
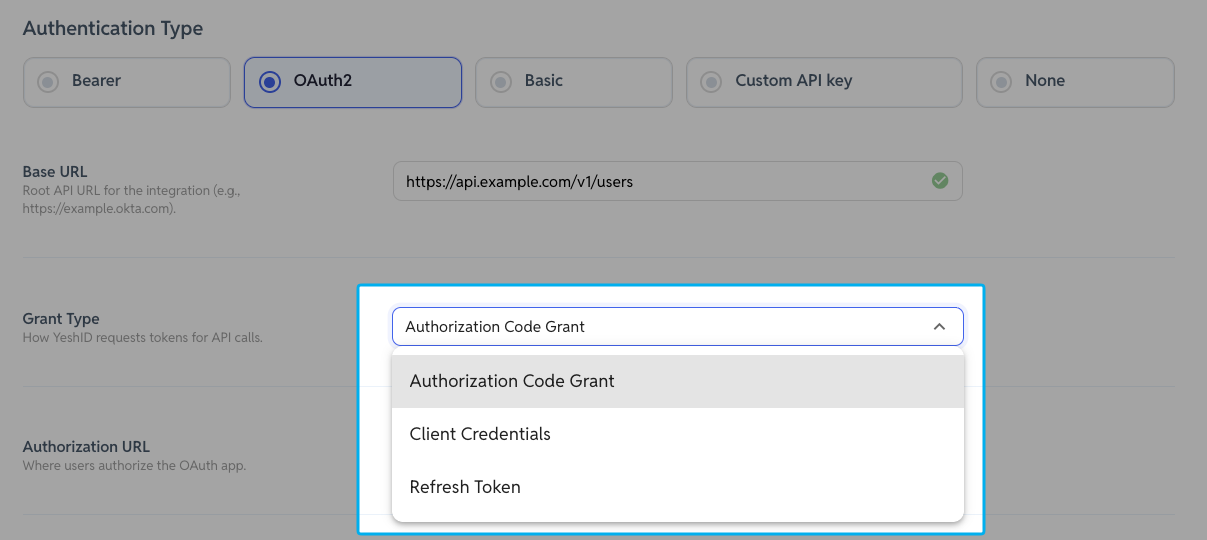
Mechanism | Inputs | Explanation |
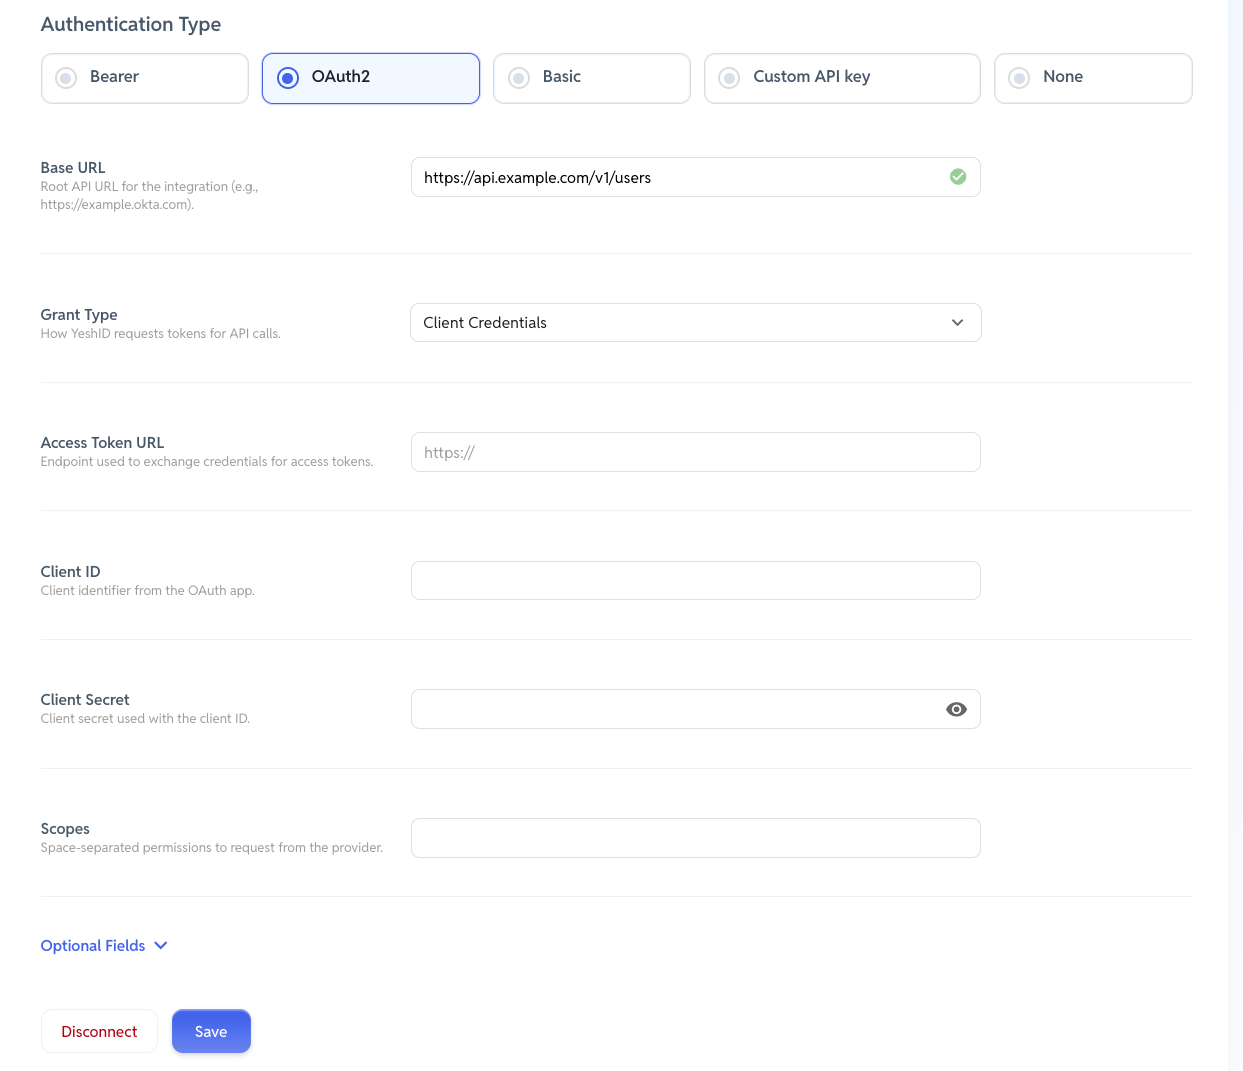
Client Credentials Grant (Most Common) | Client ID, Client Secret | Used for machine-to-machine authentication where no user is involved. The client authenticates directly with the authorization server using its credentials and receives an access token representing the application itself. Common for backend services or internal APIs. |
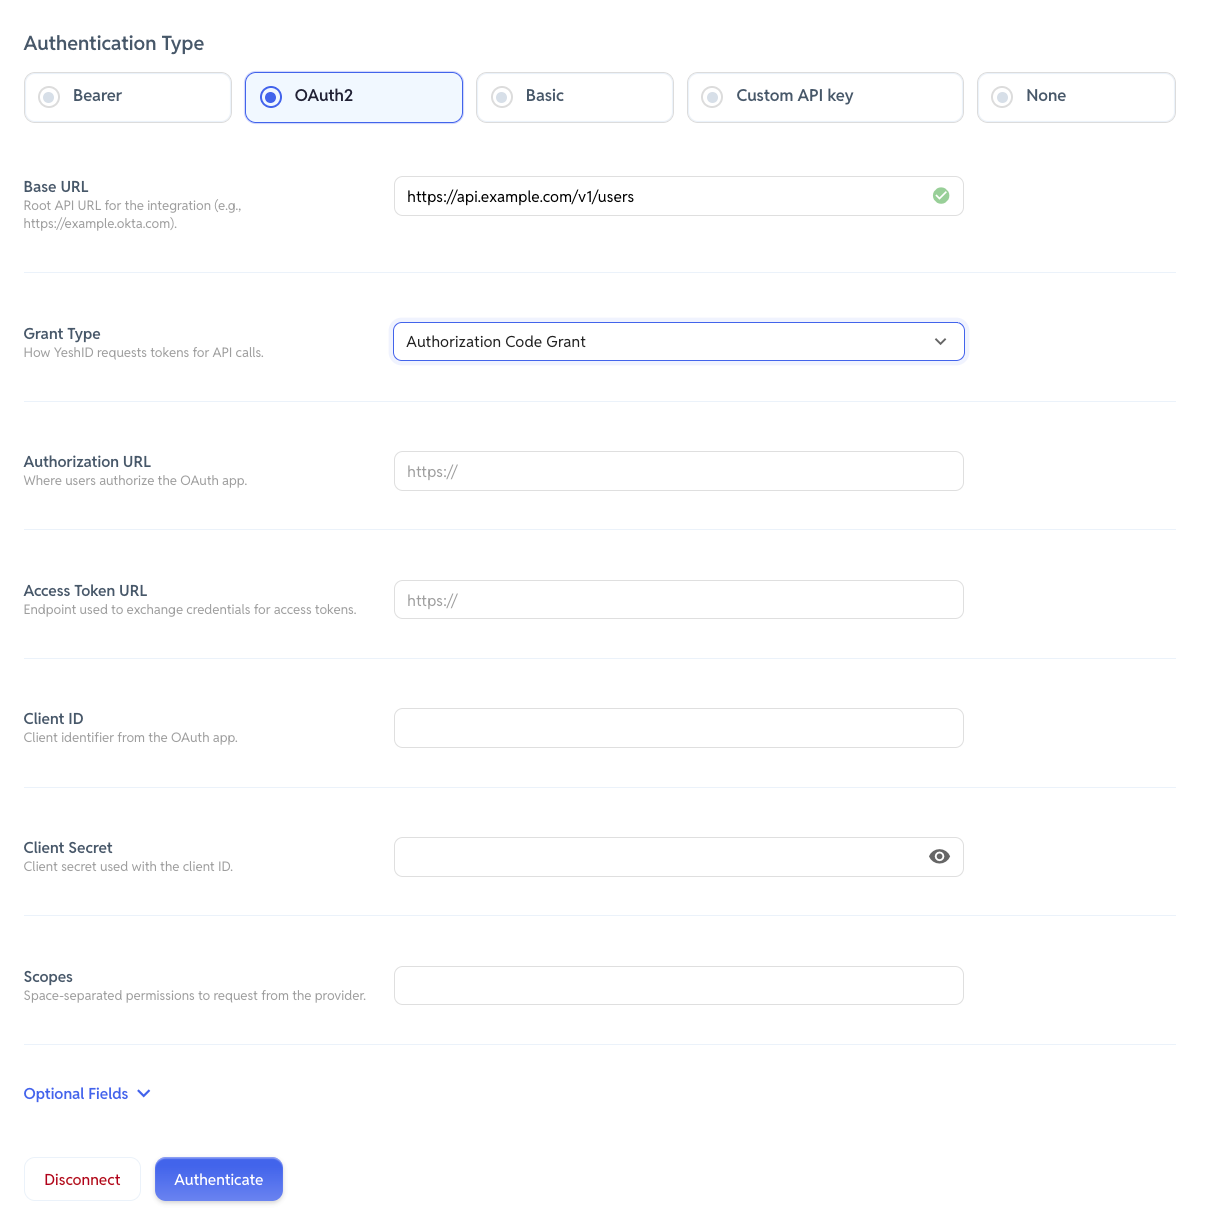
Authorization Code Grant | Client ID, Client Secret (for confidential clients), Redirect URI, Authorization Code | Used when a user logs in through a browser (typical web apps). The user authenticates with the authorization server, which returns an authorization code. The client exchanges this code for an access token. More secure than implicit flow because the token is obtained server-to-server. Often used with PKCE for public clients (mobile/SPAs). |
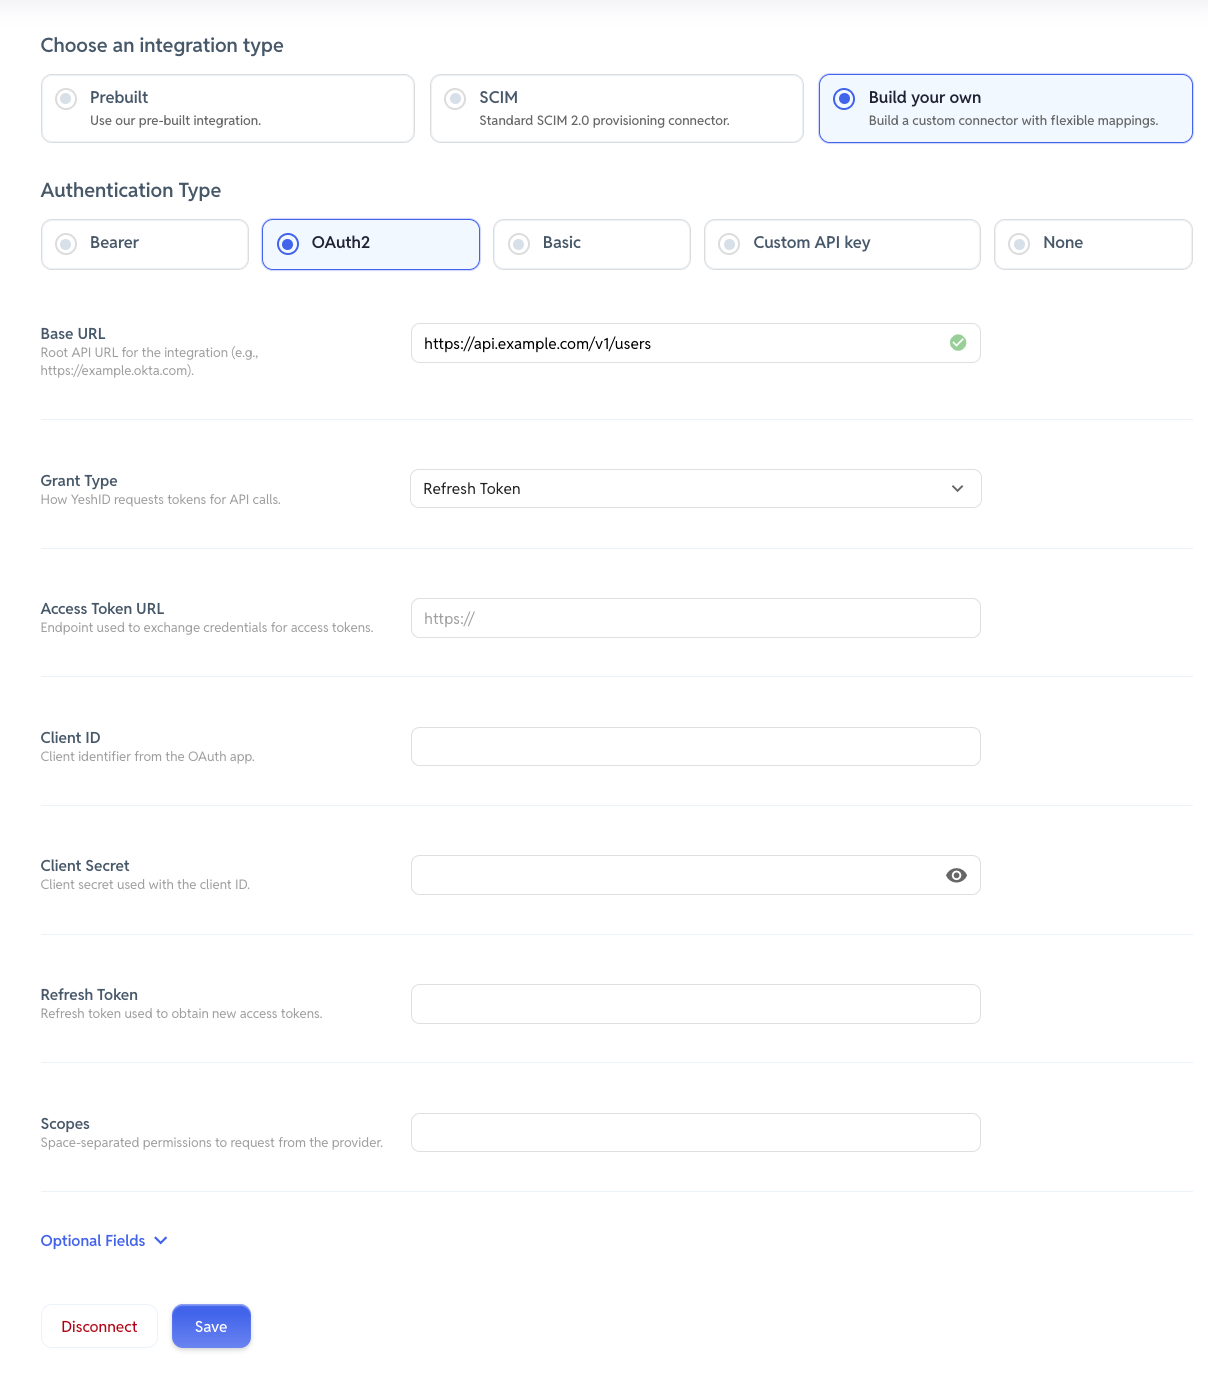
Refresh Token | Client ID, Client Secret (sometimes optional), Refresh Token | Used to obtain a new access token after the old one expires without requiring the user to log in again. The client sends the refresh token to the authorization server and receives a new access token (and sometimes a new refresh token). Helps maintain long-lived sessions securely. |
2.2.1 Authorization Code Grant
2.2.2 Client Credentials
2.2.3 Refresh Token
Scopes & Optional Fields
Sometimes, your application may require that scopes are explicitly specified during authentication (i.e. specifying
users.read). This can be added in under Scopes
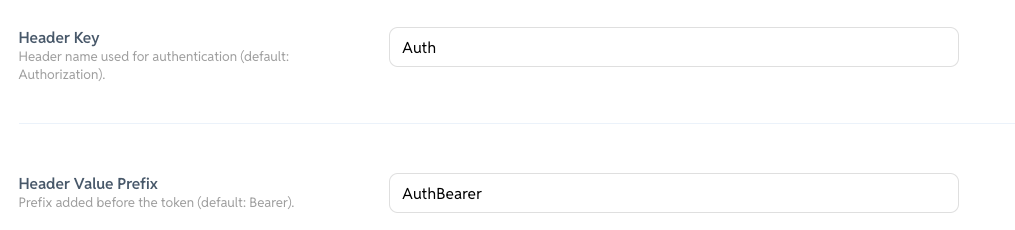
Some Applications may use non-standard header keys and value prefixes (i.e. use
Auth: AuthBearer YOUR_ACCESS_TOKENinstead ofAuthorization: Bearer YOUR_ACCESS_TOKEN)
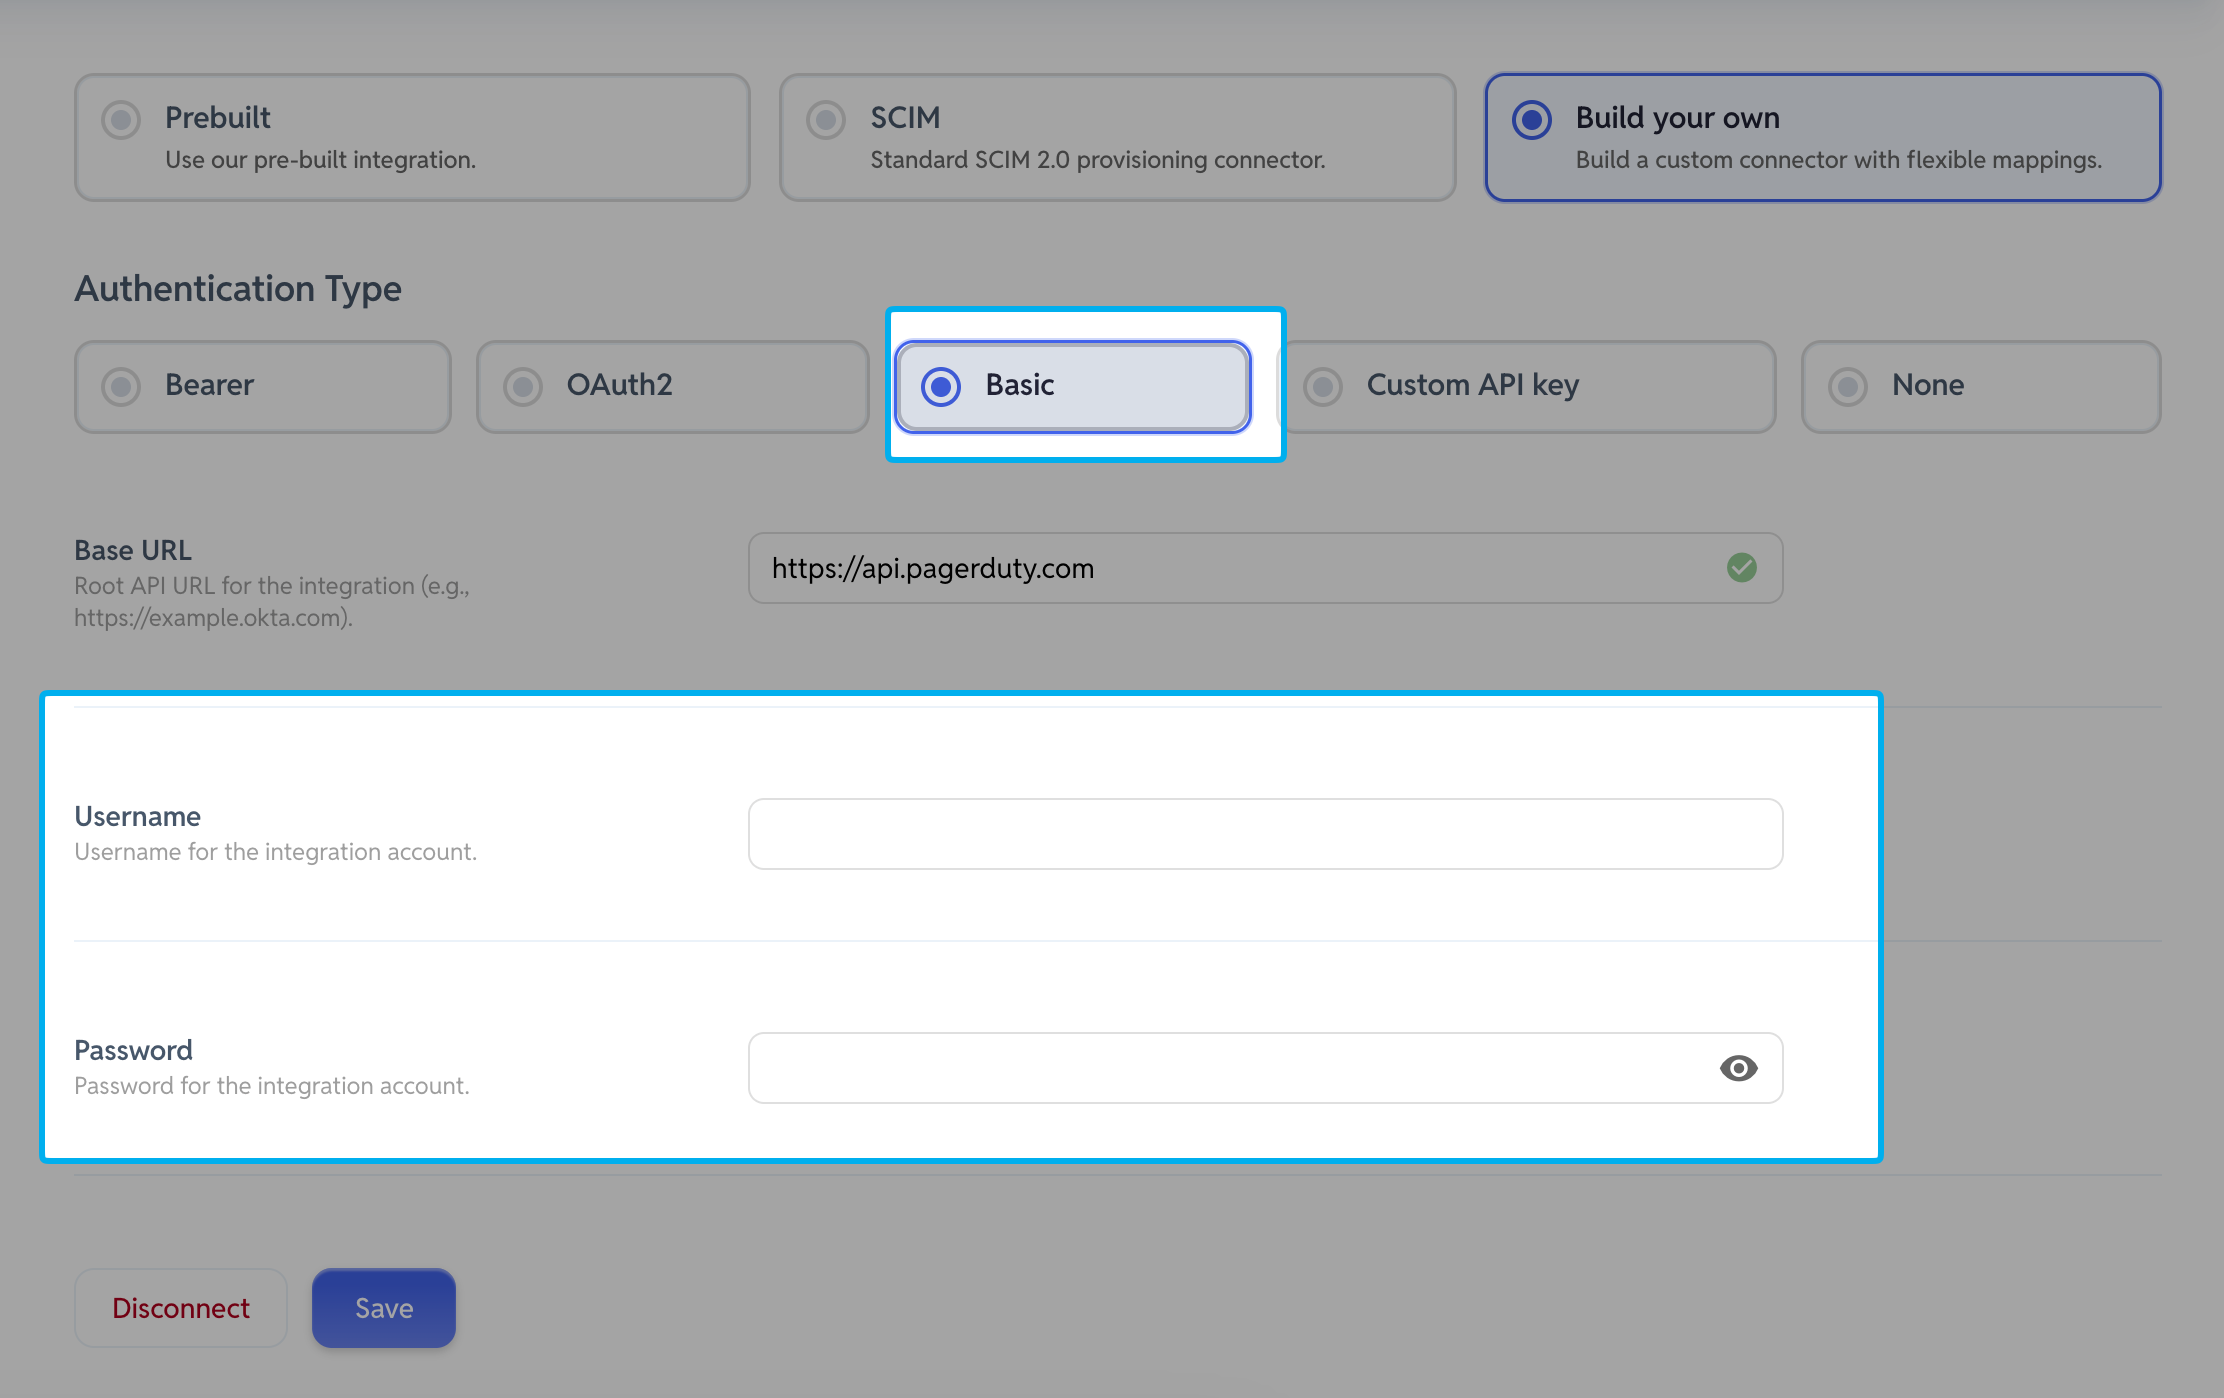
Basic Authentication
Basic Authentication is an API authentication method where a client sends a Base64-encoded
username:passwordin the HTTPAuthorizationheader with each request.
Use this mechanism if your Application expects basic username+password authentication.
Custom API Key
Custom API Key's are used if your application expects authentication details into non-standard headers (i.e. requires x-api-key instead of Authorization bearer )
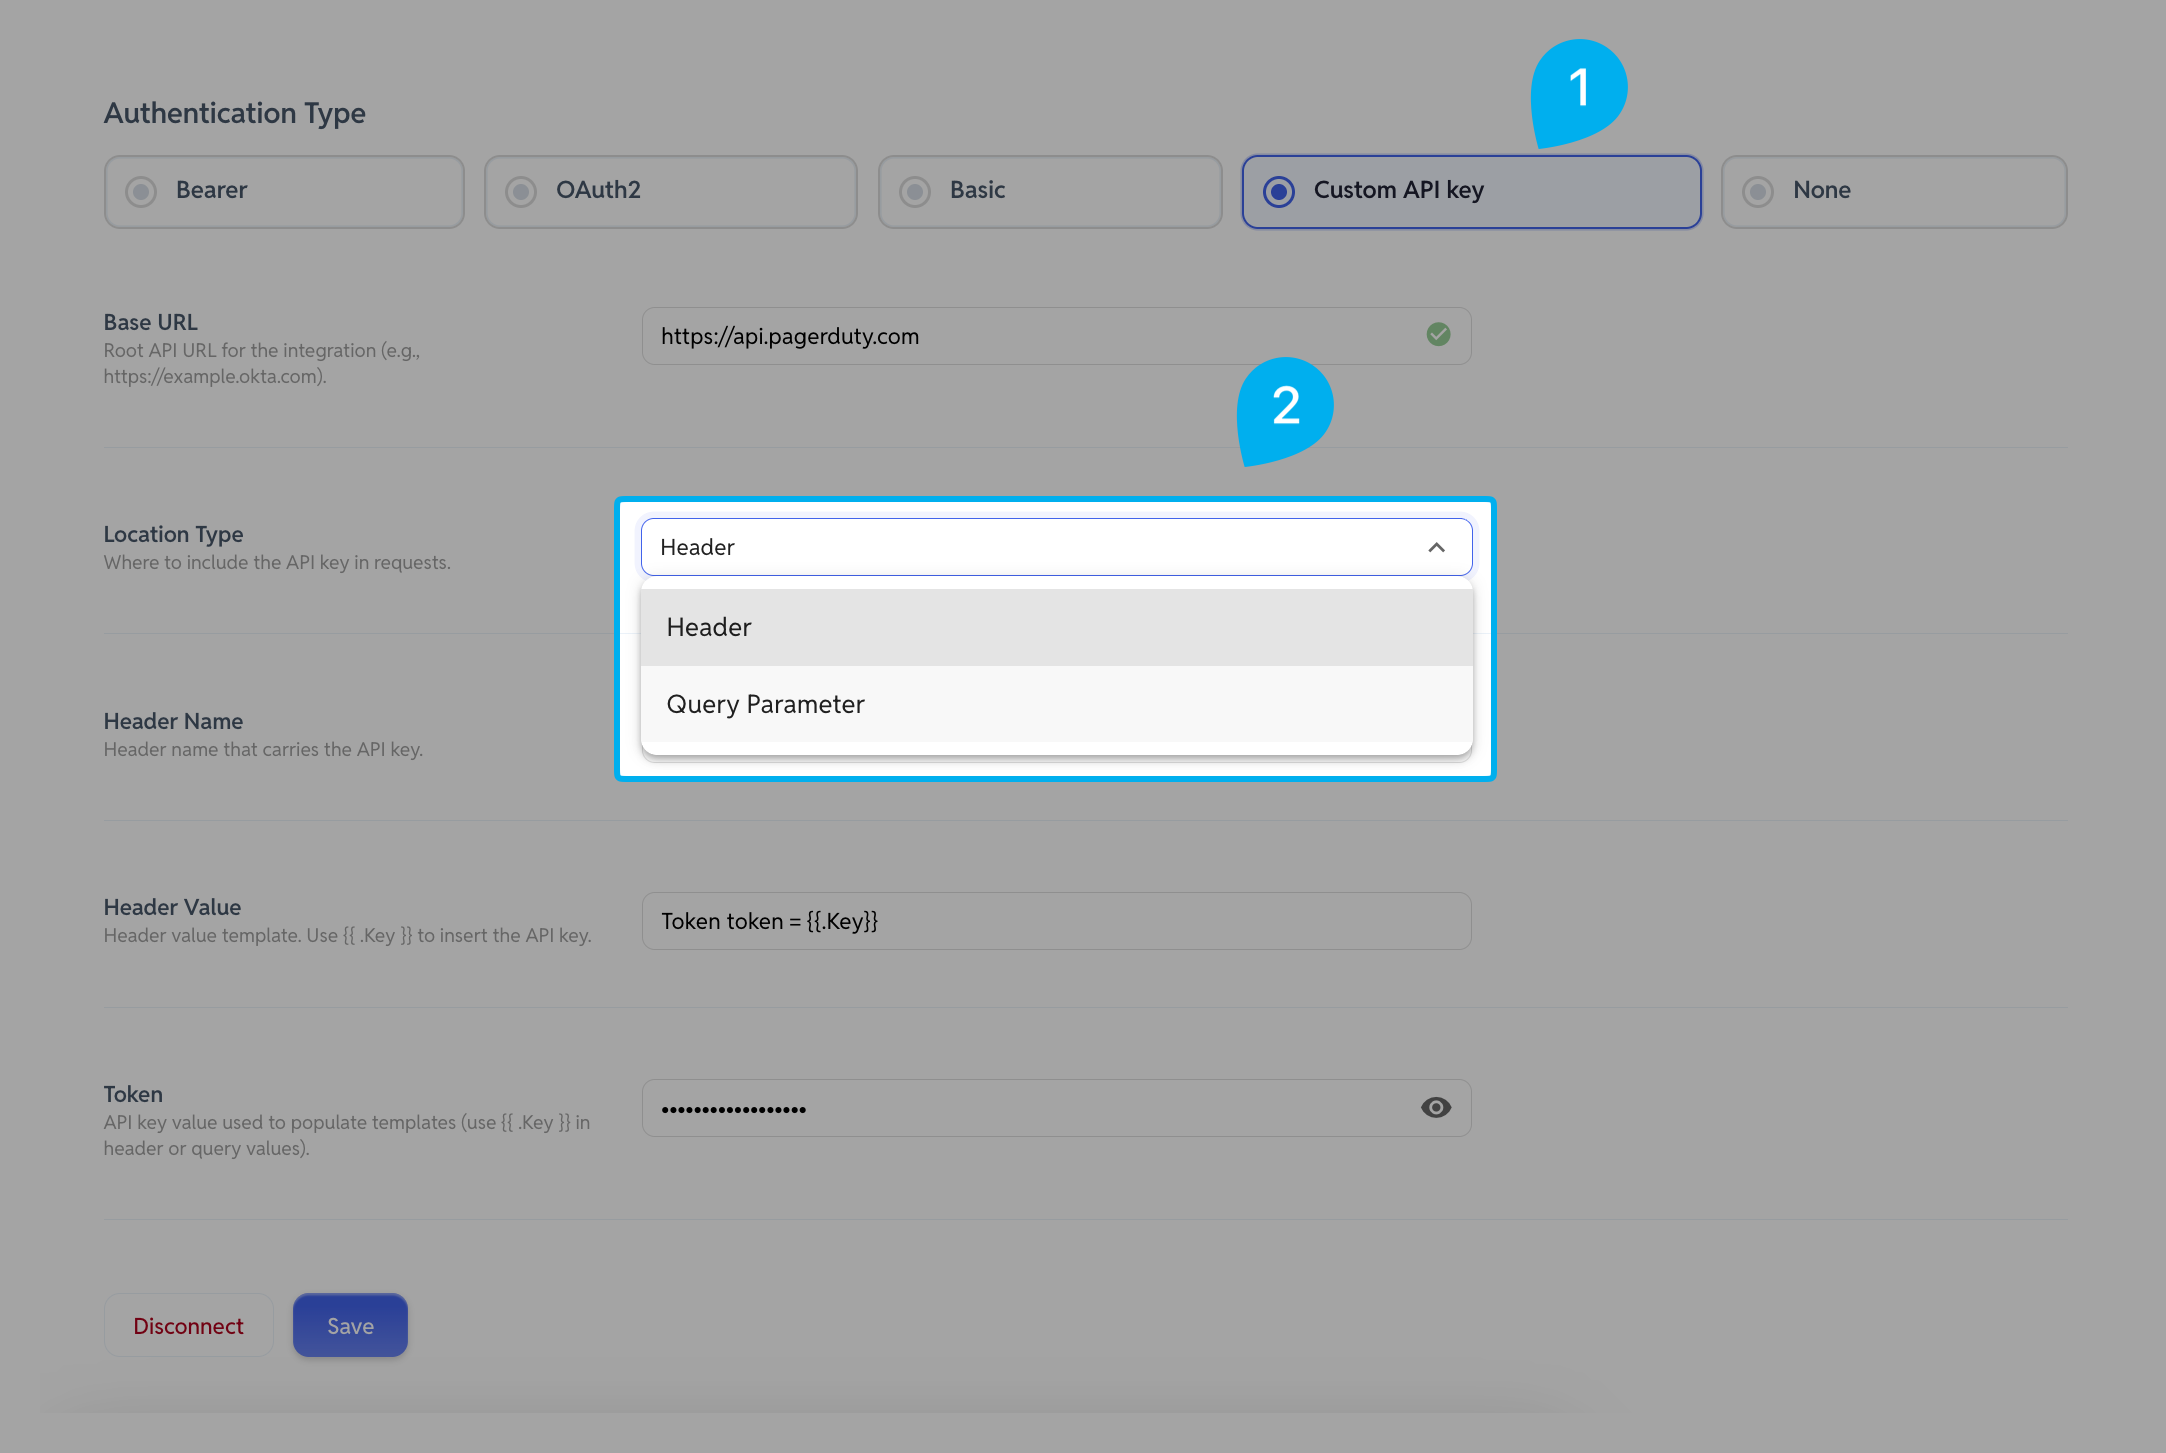
Authorization Params can be added to the Header or included as Query Parameters.
In the case of Pagerduty:
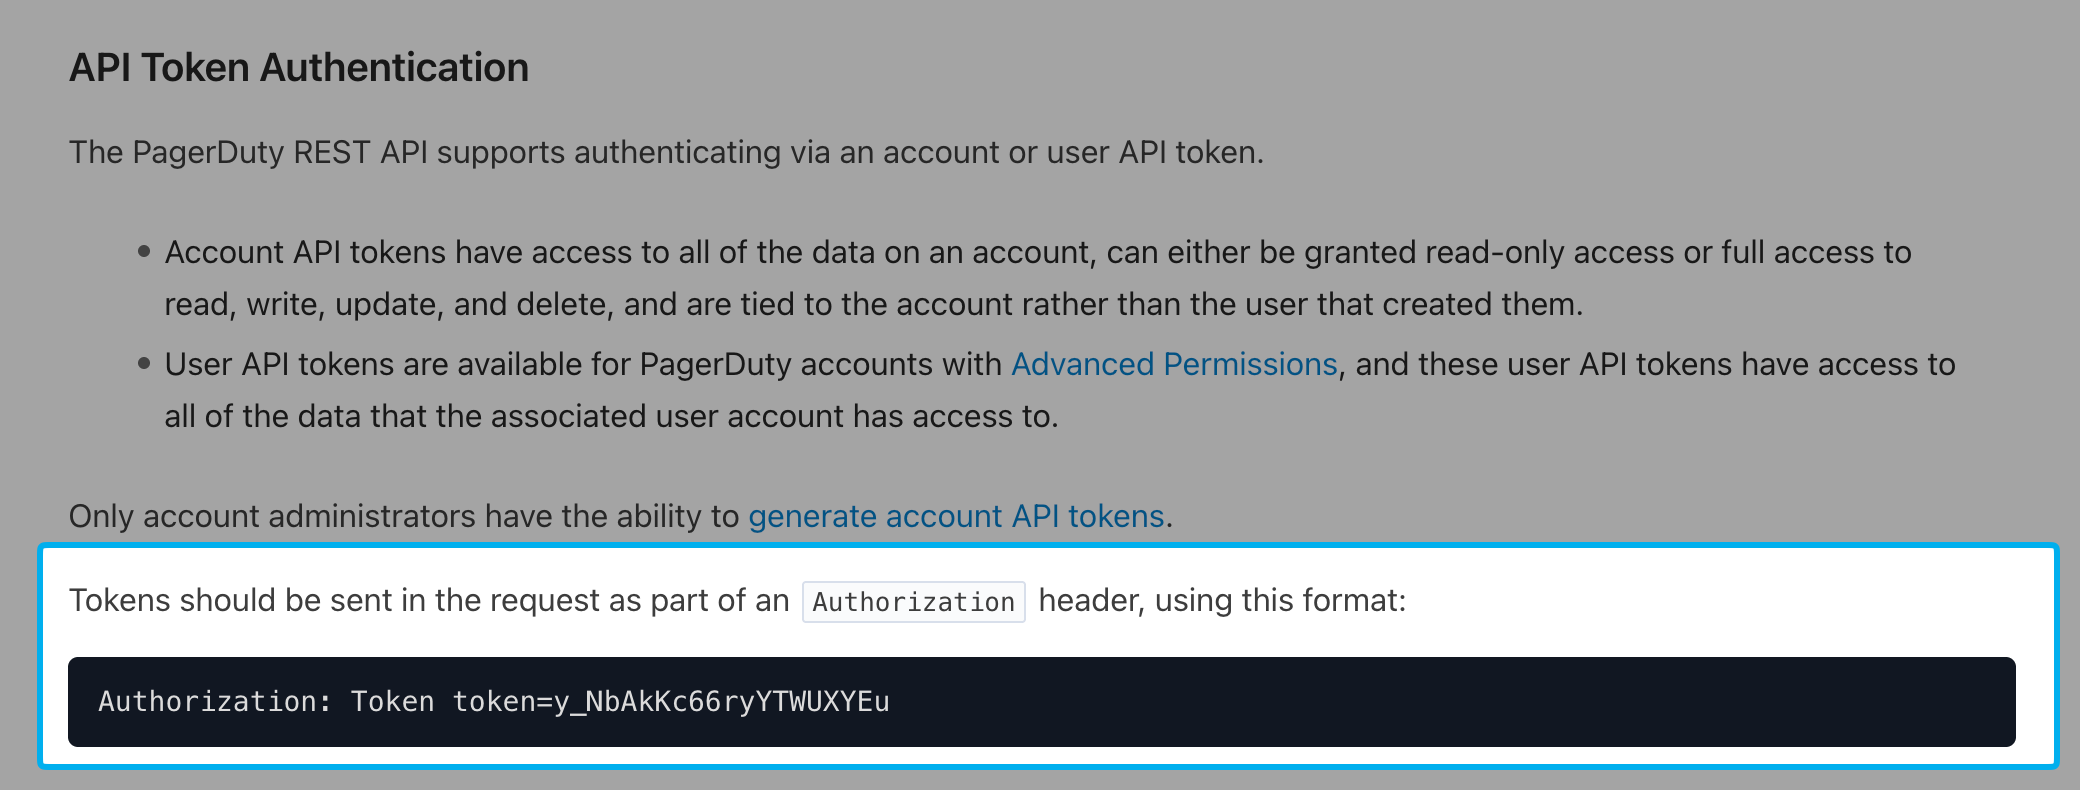
PagerDuty expects auth in the header in a non standard format of Authorization: Token token=<your_token>
To handle this we set:
Location Type:
HeaderHeader Name:
AuthorizationHeader Value:
Token token = {{.Key}}where the key is set inToken
None
In the highly unlikely state that your applications don't require any Authentication, you can use this option.
Configure the Integration Actions
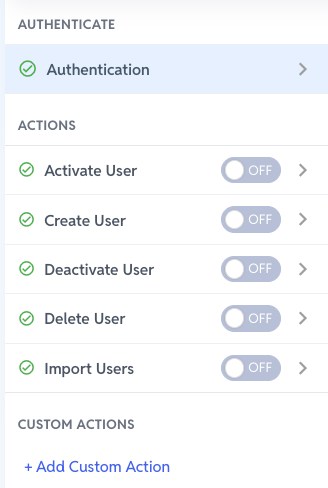
In YeshID, the main operations that are focused on are (CRUD):
Create - Create User
Retrieve - Import Users
Update (Not used)
Delete - Delete or Deactivate User
Activate - Used by some applications that initially create users in a non-active state (i.e. "Invited), and requires a subsequent "Activate" action to transition them to "Active").
Don't see some / any of these actions?
Your Authentication settings must be configured first; and
If using a Prebuilt integration, YeshID will only display the actions that are known to be supported.
Enable the Integration Actions
Actions are what enables the basic operations that YeshID requires to work with your applications. See the Integration Actions & Enablement Table above.
UI Managed Integrations
Most integrations will be detailed in your application's documentation, and usually consist of:
And endpoint URL
An HTTP method (i.e.
GETfor list users,POSTfor creating a user)A payload (usualy only required creating users)
Example - Importing Users
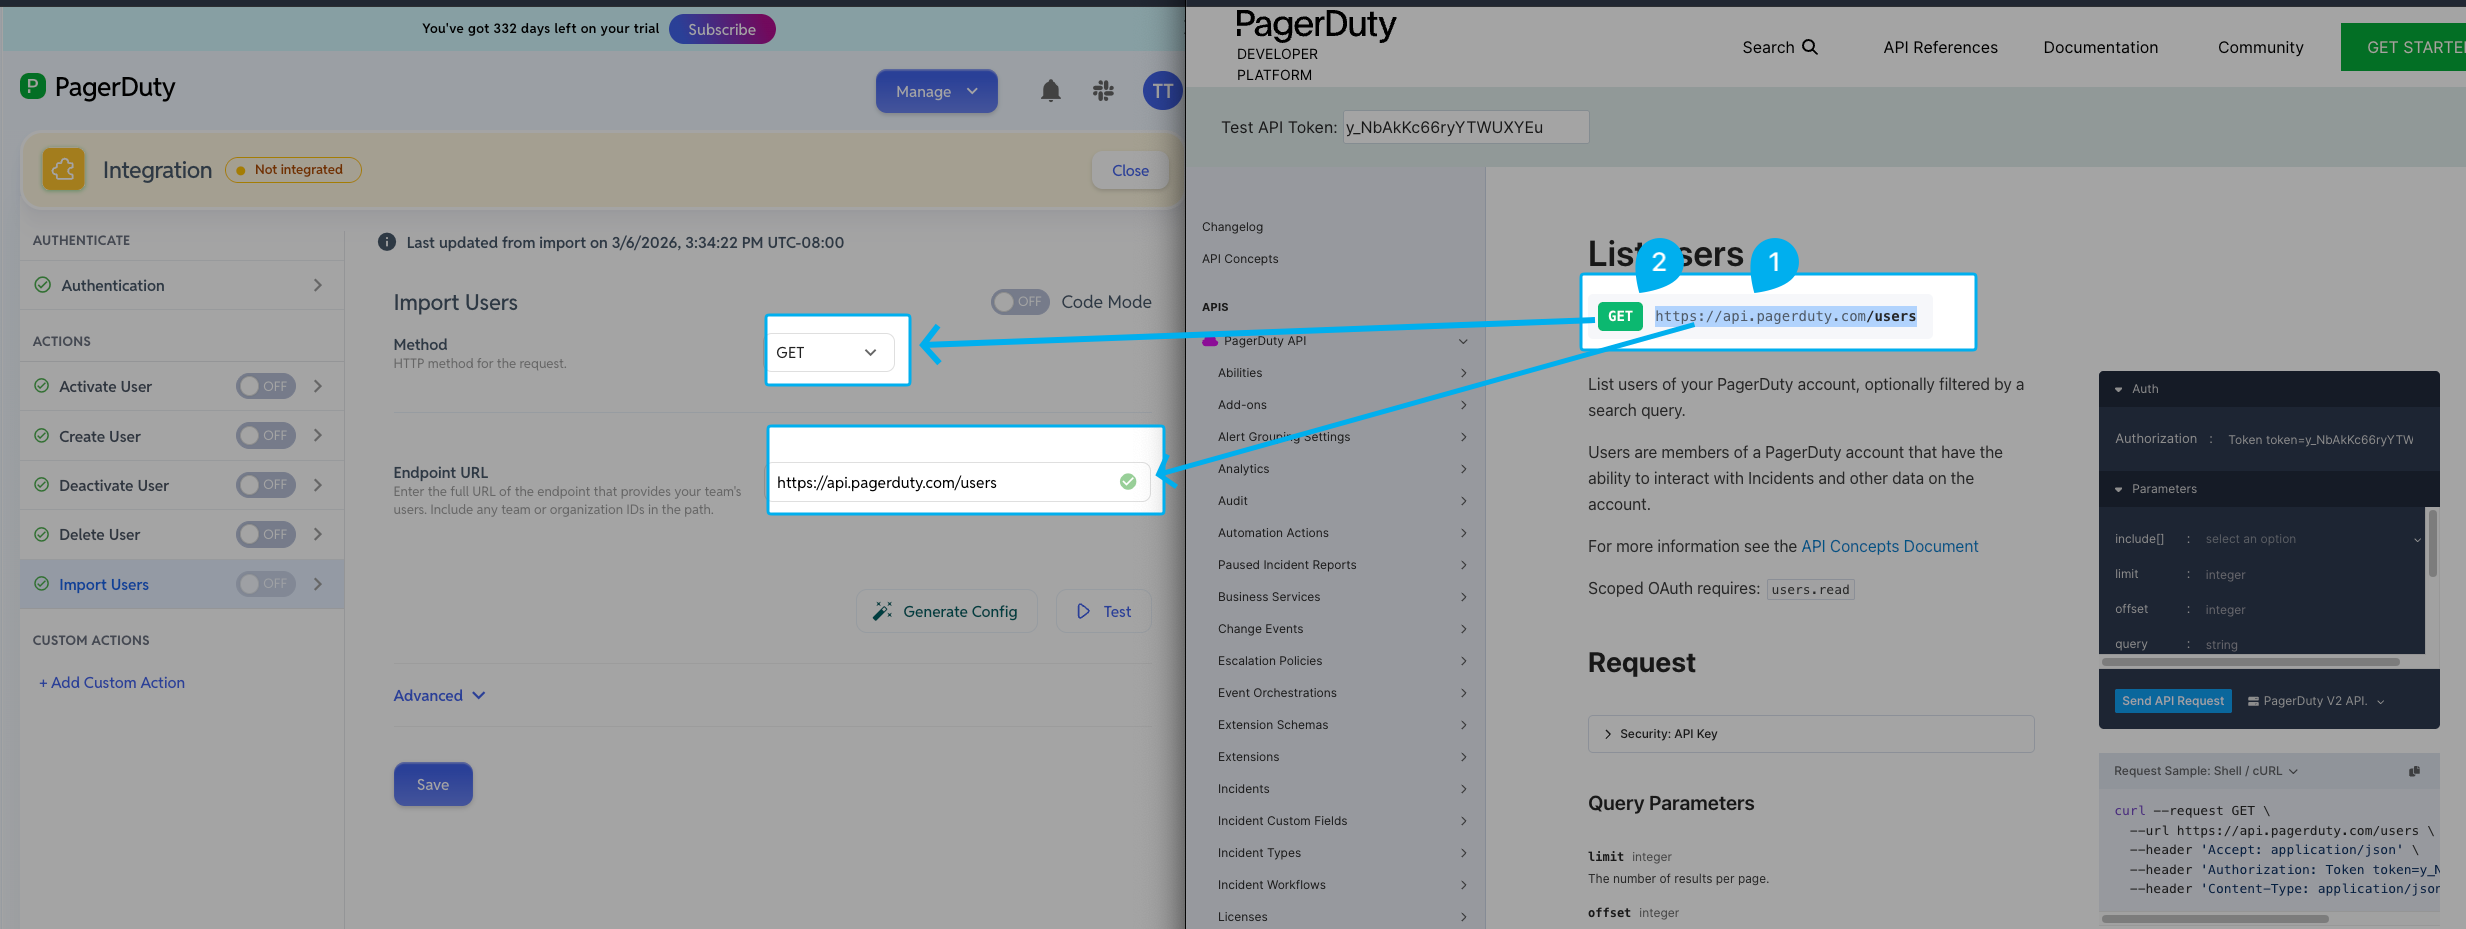
Click into the Action (Import Users)
Enter in the details from your Application
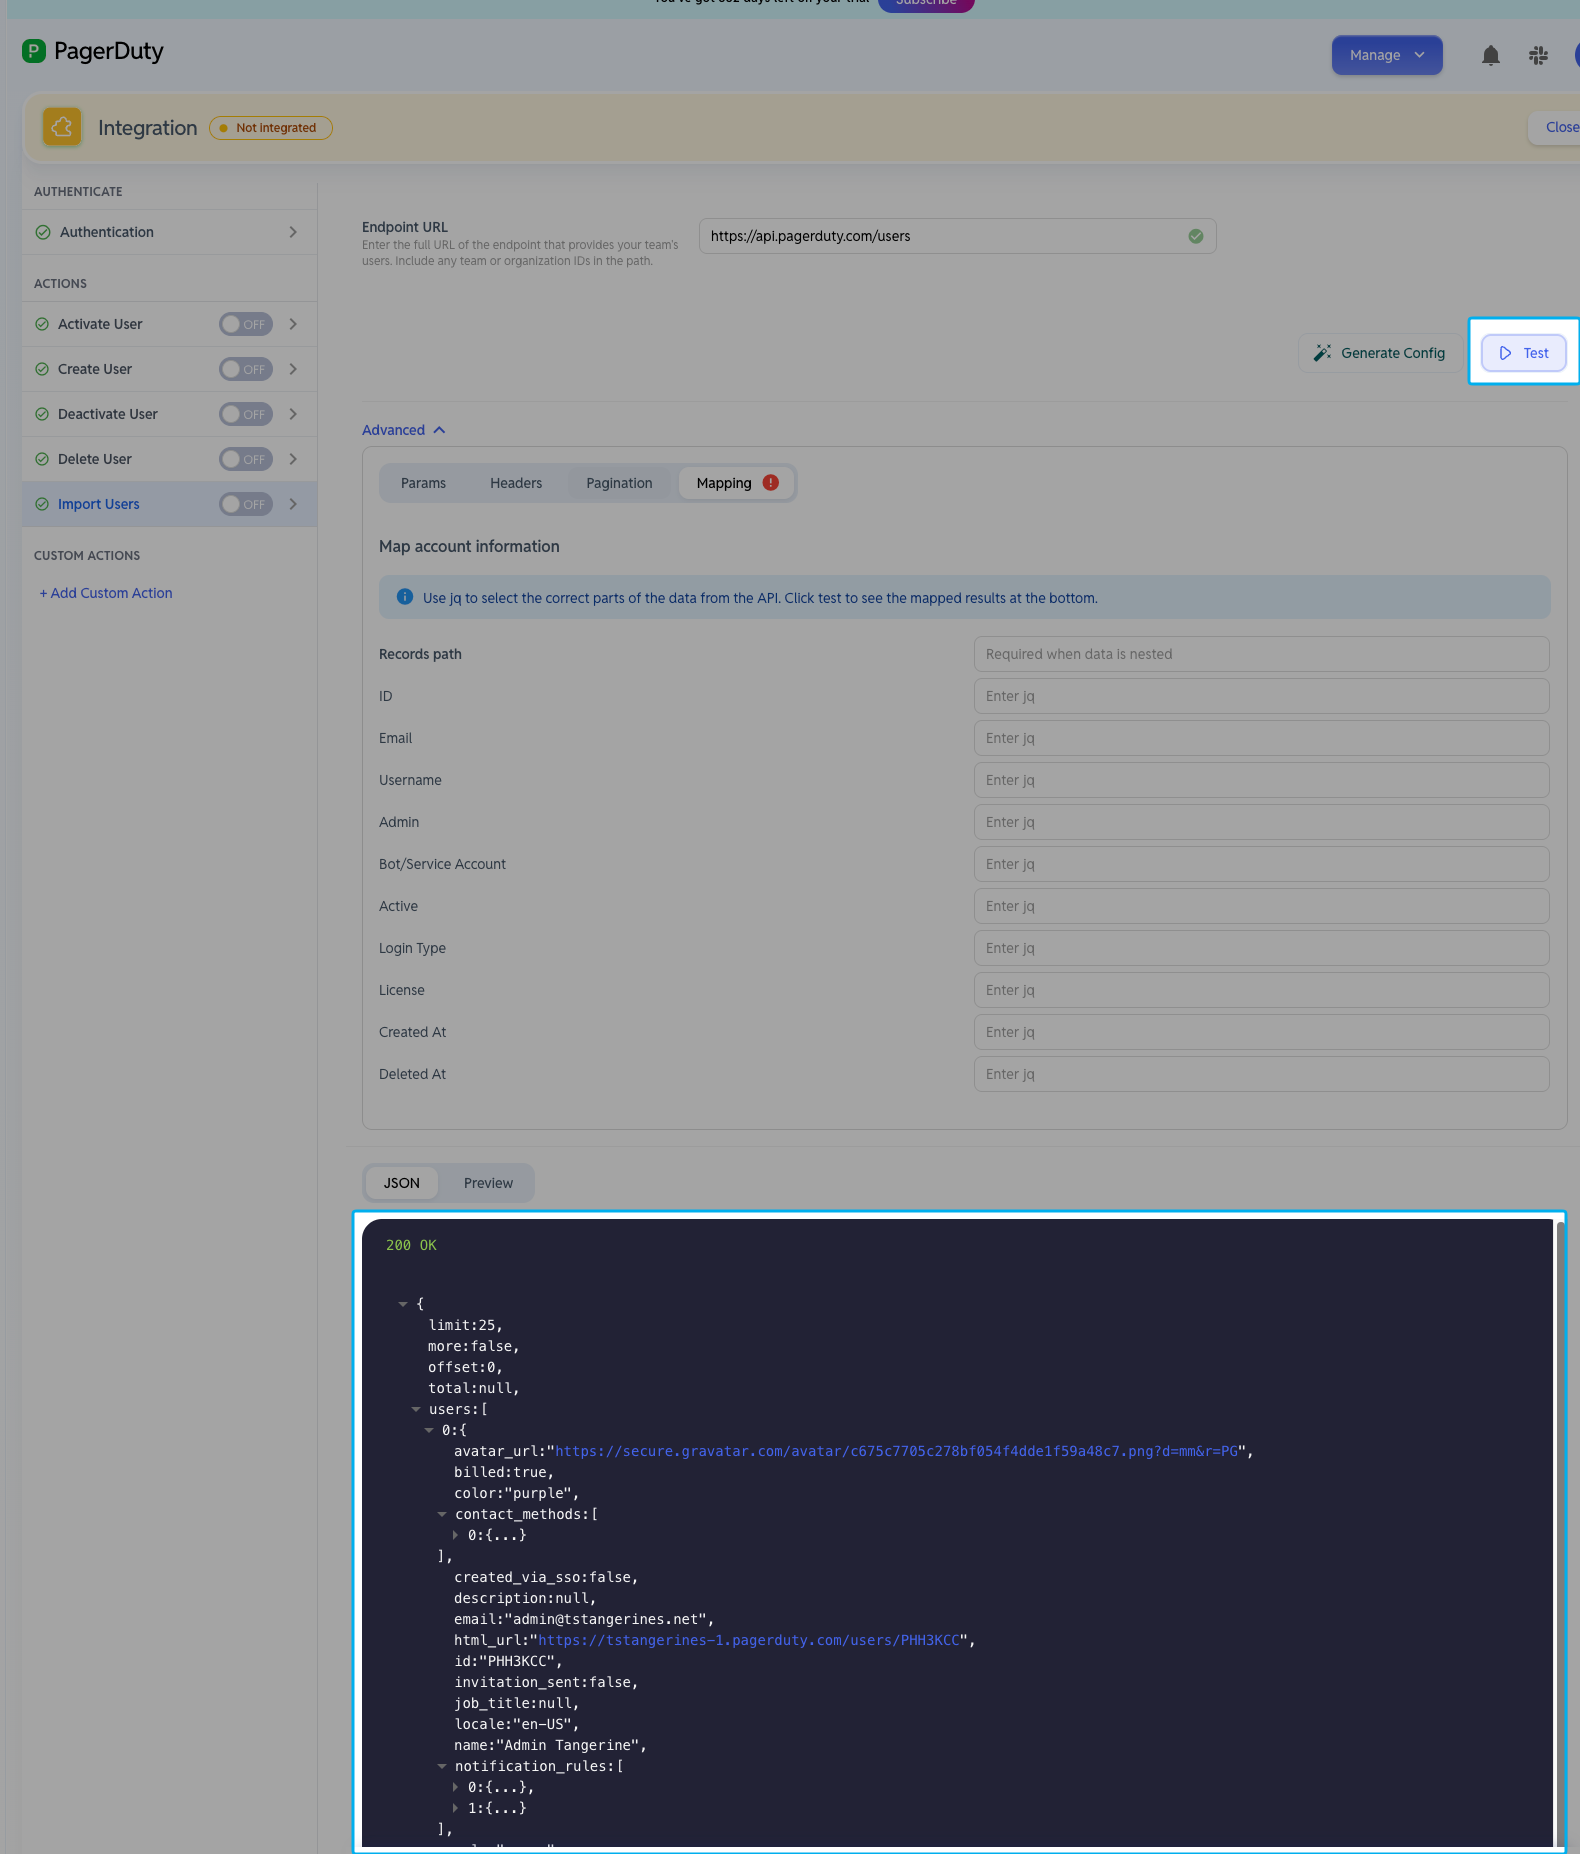
Click "Test"
Examine the response that is returned from the API. Most API's will return all users in JavaScript Object Notation (JSON)
Map the fields to your users with Agent Yesh
Click "Generate Config"
Confirm the mappings below.
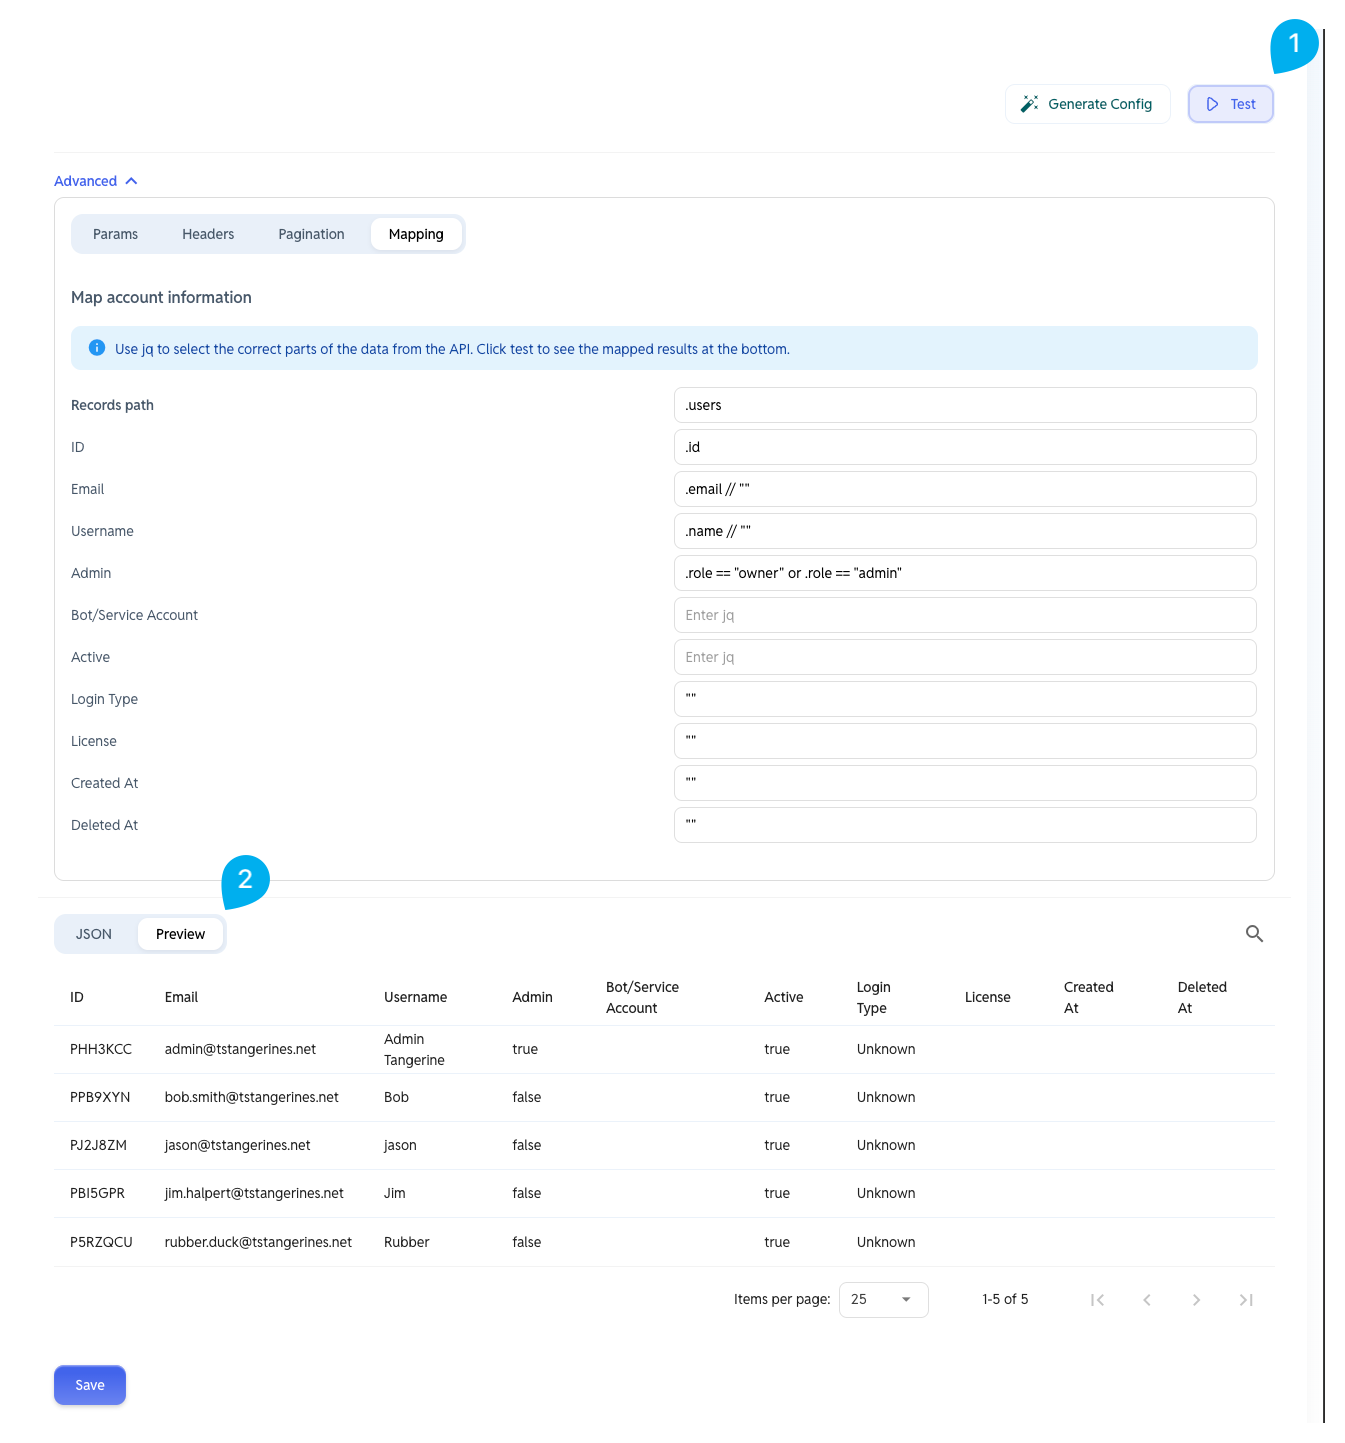
If they are incorrect, see below for how to Map the fields to users Manually
Map the fields by clicking "Save"
Map the fields to your users (MANUALLY)
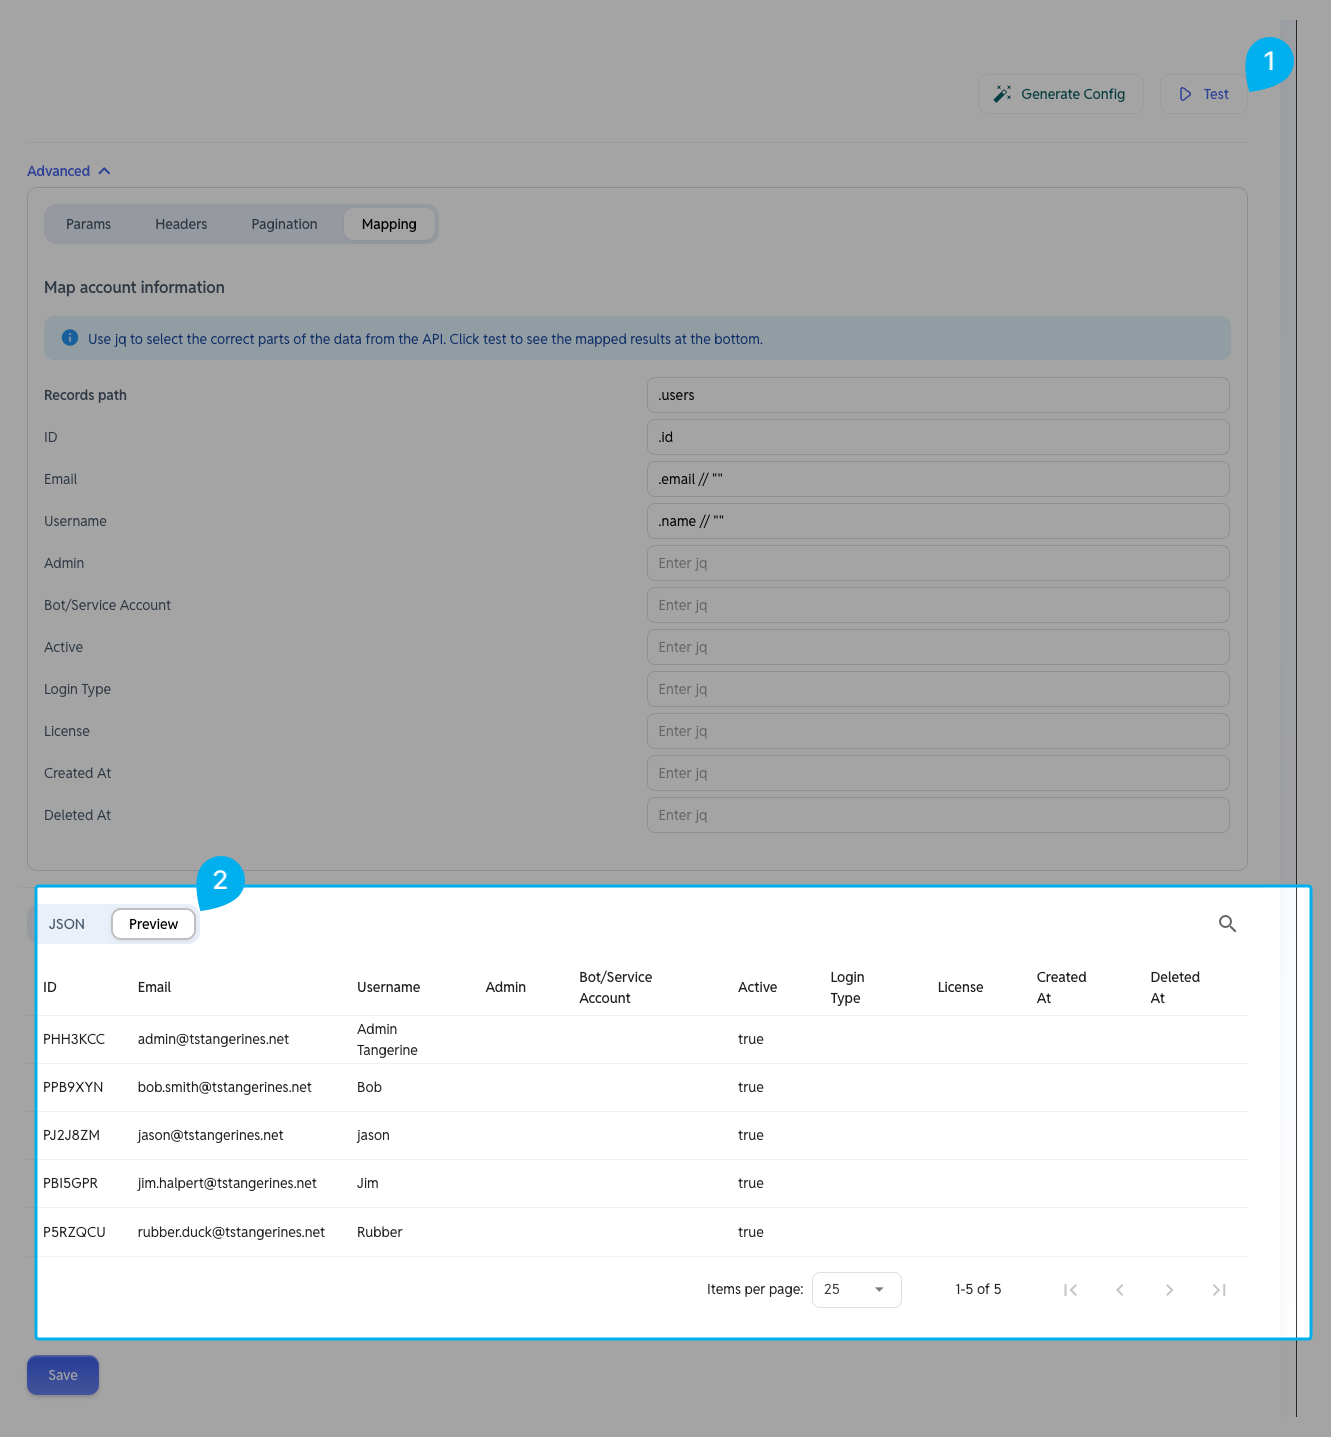
You can manually specify the mappings using jq the "Map account information" field.
Default values required to map to a user are:
ID- this is also referred as the "ExternalID" (this is what's used in future operations for updates, deletes etc)Email- This is the field that's used to link with YeshID people.Name
Example:
Records Path:
.usersID:
.idOr empty:
In JQ, we use
//""to substitute a""as a default value if the field is empty.Email:
.email // ""Name:
.name // ""
Click Test to see the mappings and flip to Preview to validate.
Map the fields by clicking "Save"
Enable the Action
This will trigger an immediate sync with your application.
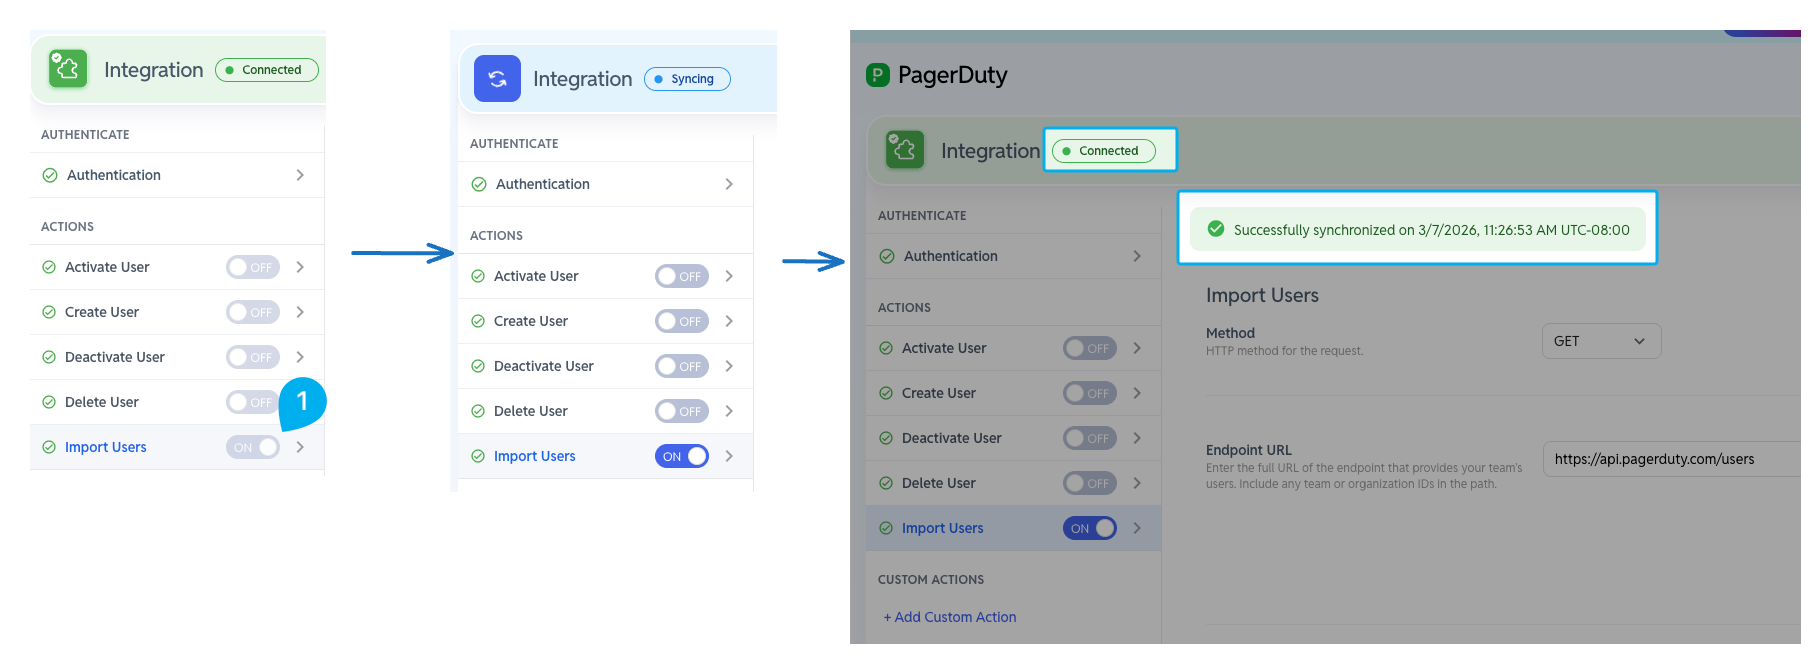
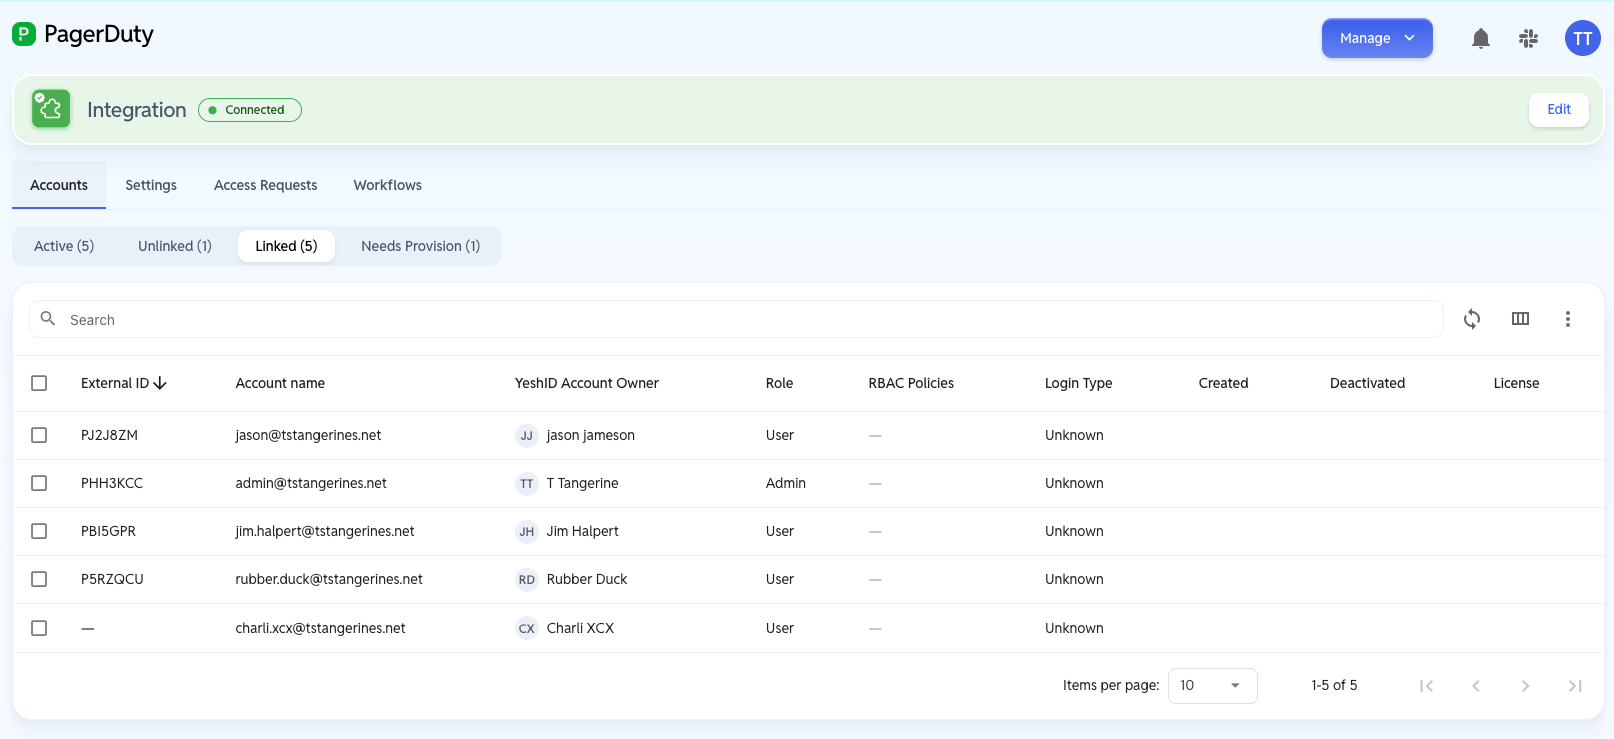
Congratulations! Your users are now synced with your Application. Clicking into your Application and clicking on "Accounts" will show all your users, automatically kept in sync.
4.1.1 Example - Creating Users
Click into the Action
Set the Method
Set the Endpoint URL
Click Advanced to add the Payload Body
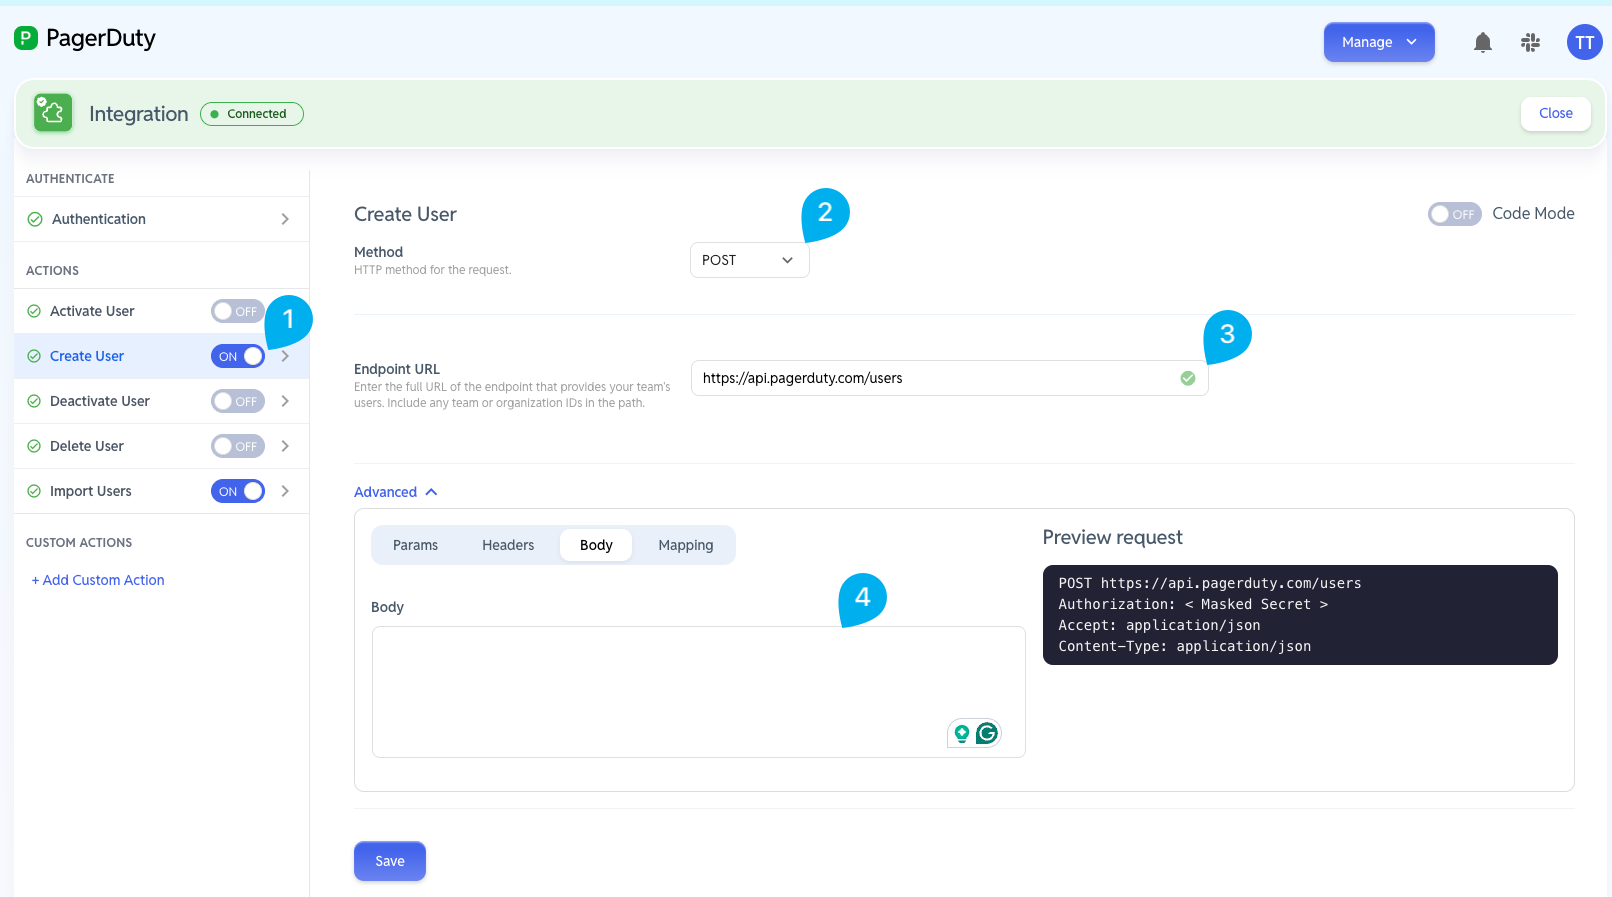
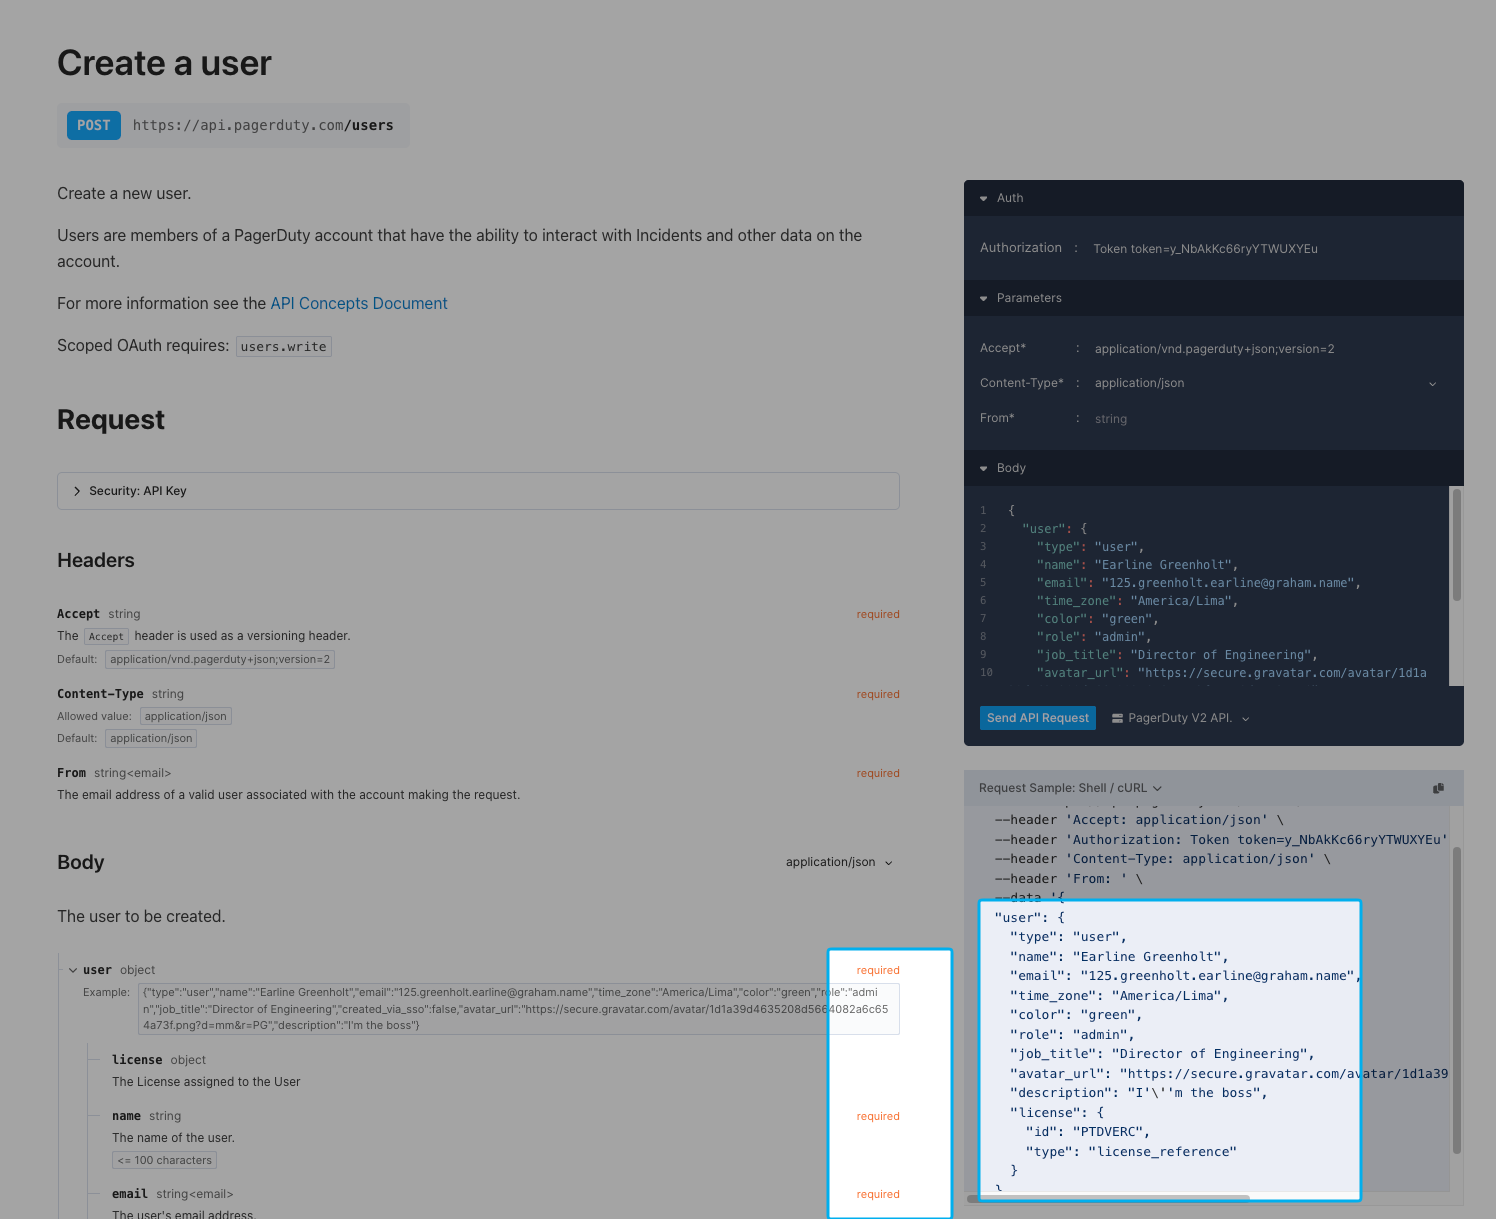
Refer to your application's documentations to determine what information must be provided in the payload. For example, for Pagerduty Create User
Required JSON Payload
Note that only required fields are:
{
  "user": {
        "name": "",
        "email": ""
    }
}
Construct the JSON payload.
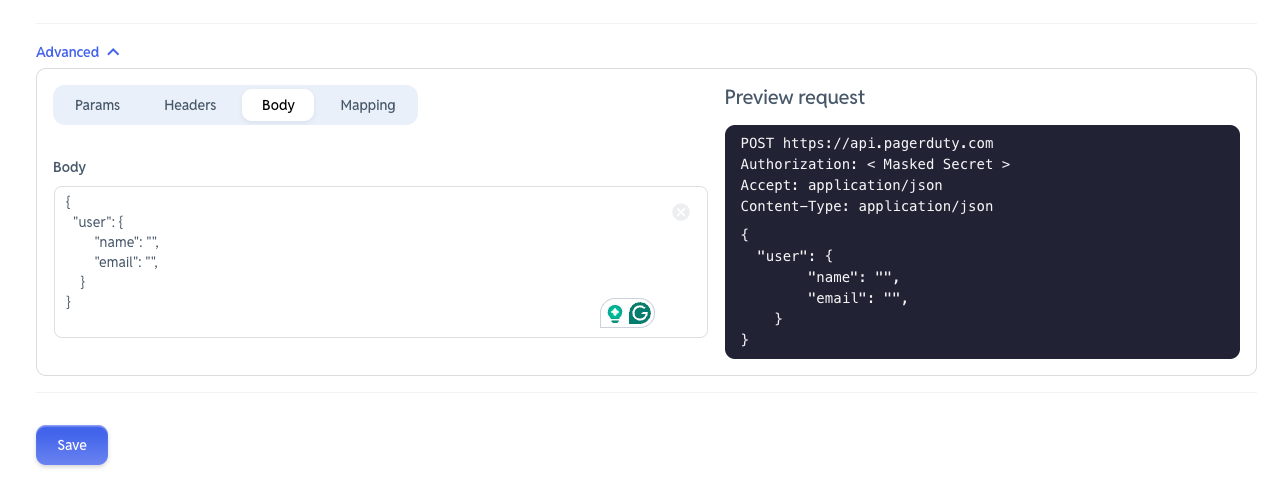
Enter in the required template variables
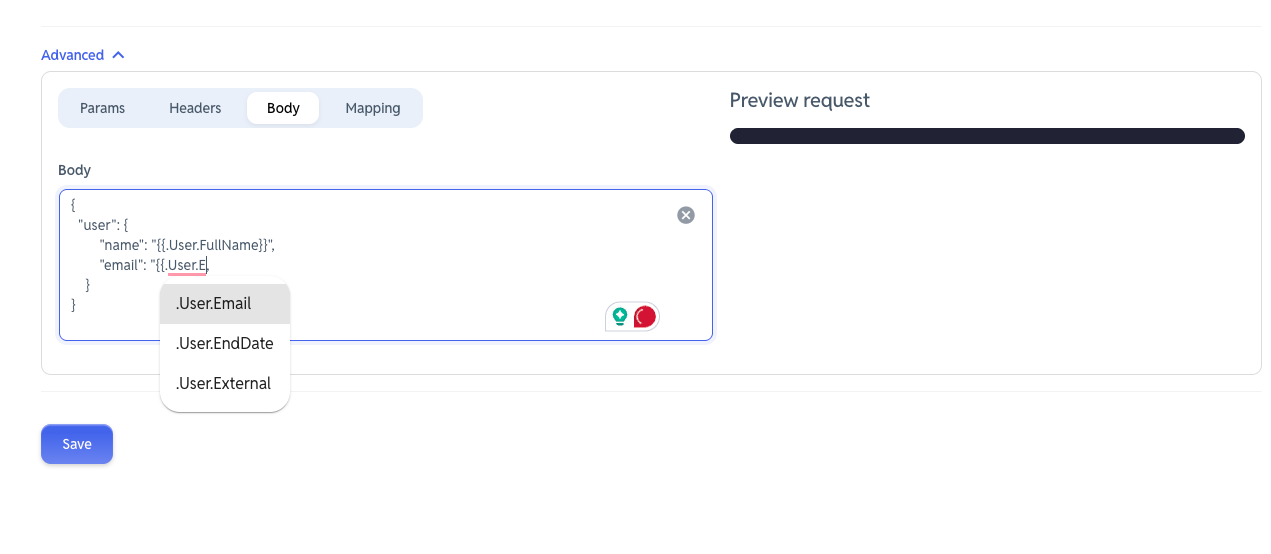
What values can I enter here? Refer to our Template Variables document.
Confirm the payload (preview uses the currently logged in user)
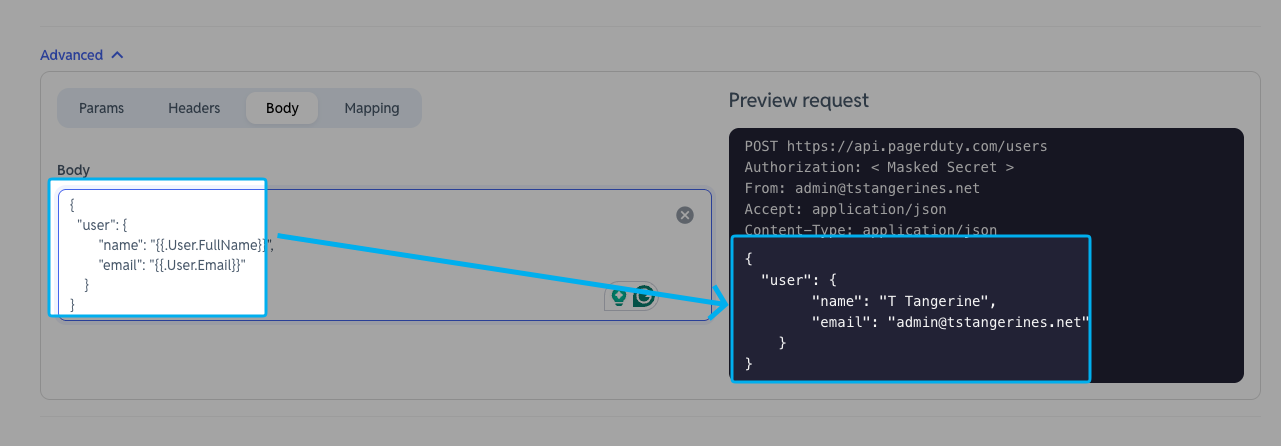
Click "Save"
Enable the Integration
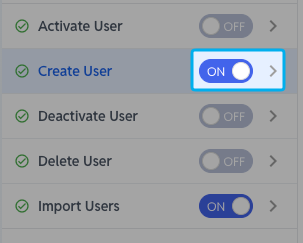
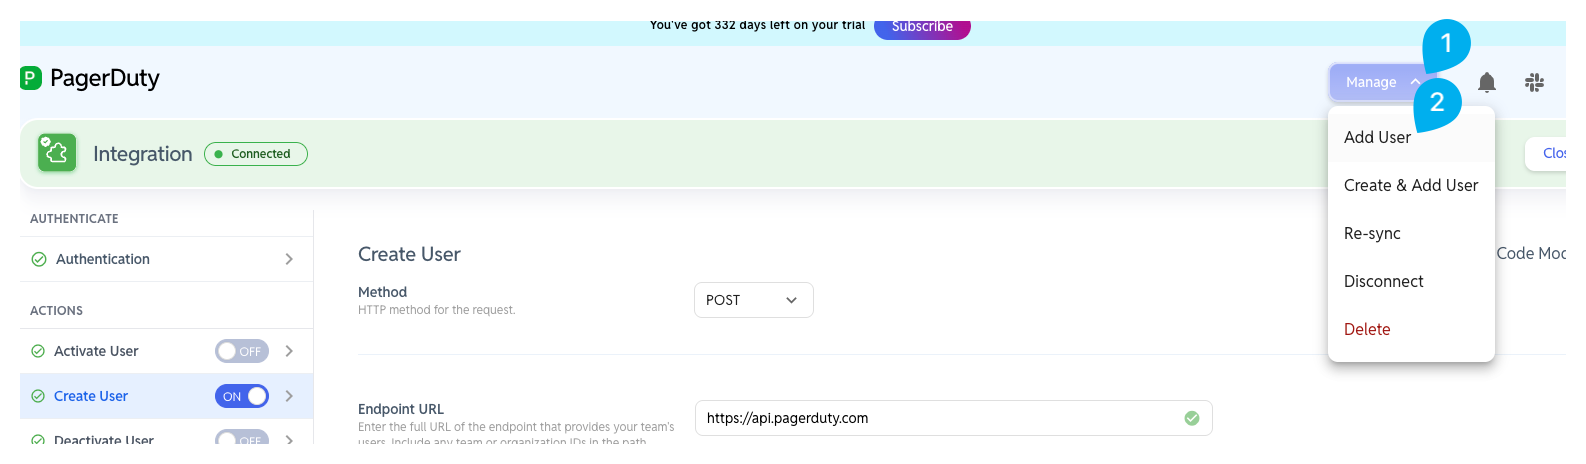
Test the Create user action
Click "Manage" > Add User
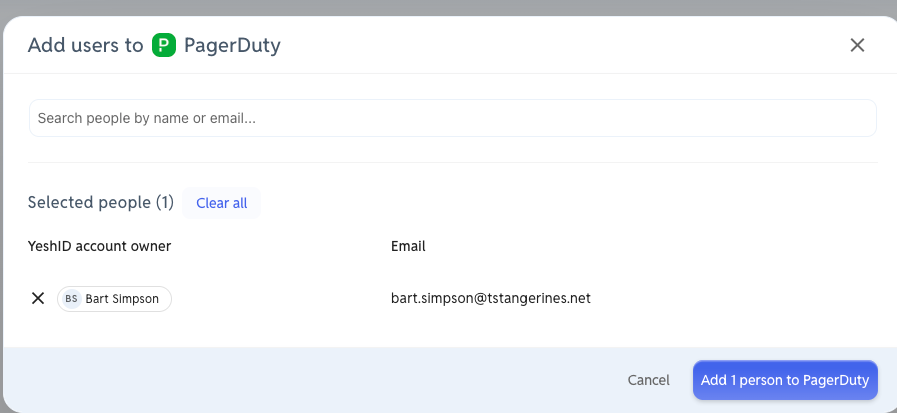
Pick an Existing User and click "Add 1 person to <app>"
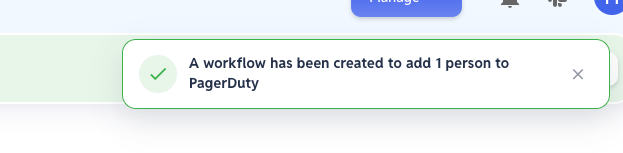
You should see "A workflow has been created to add 1 person to PagerDuty"
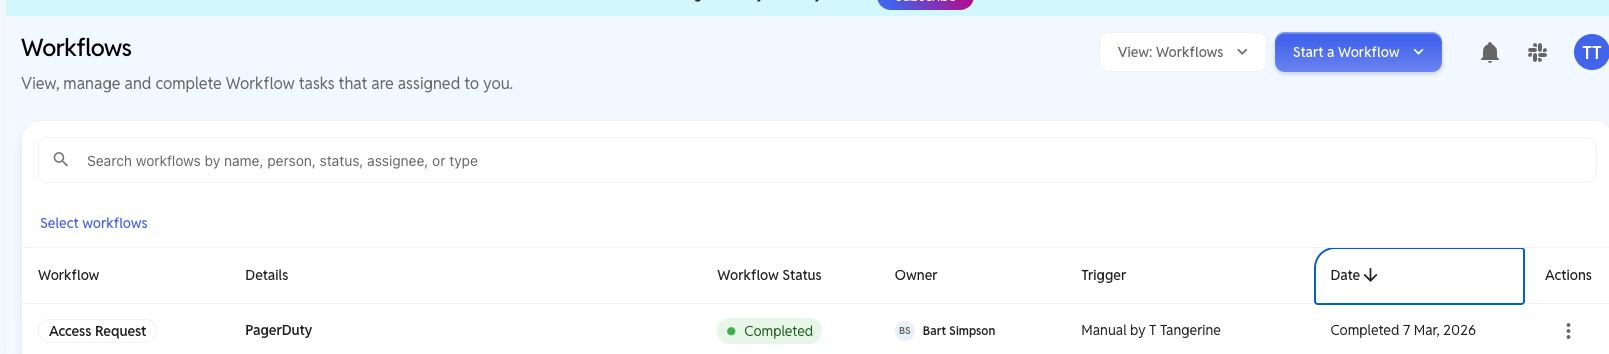
Congratulations! You can now automate the provisioning of applications via YeshID Application Integration Actions.
Code-Backed Integrations
See documentation here
Add Custom Actions
There may be certain times that custom actions are required.
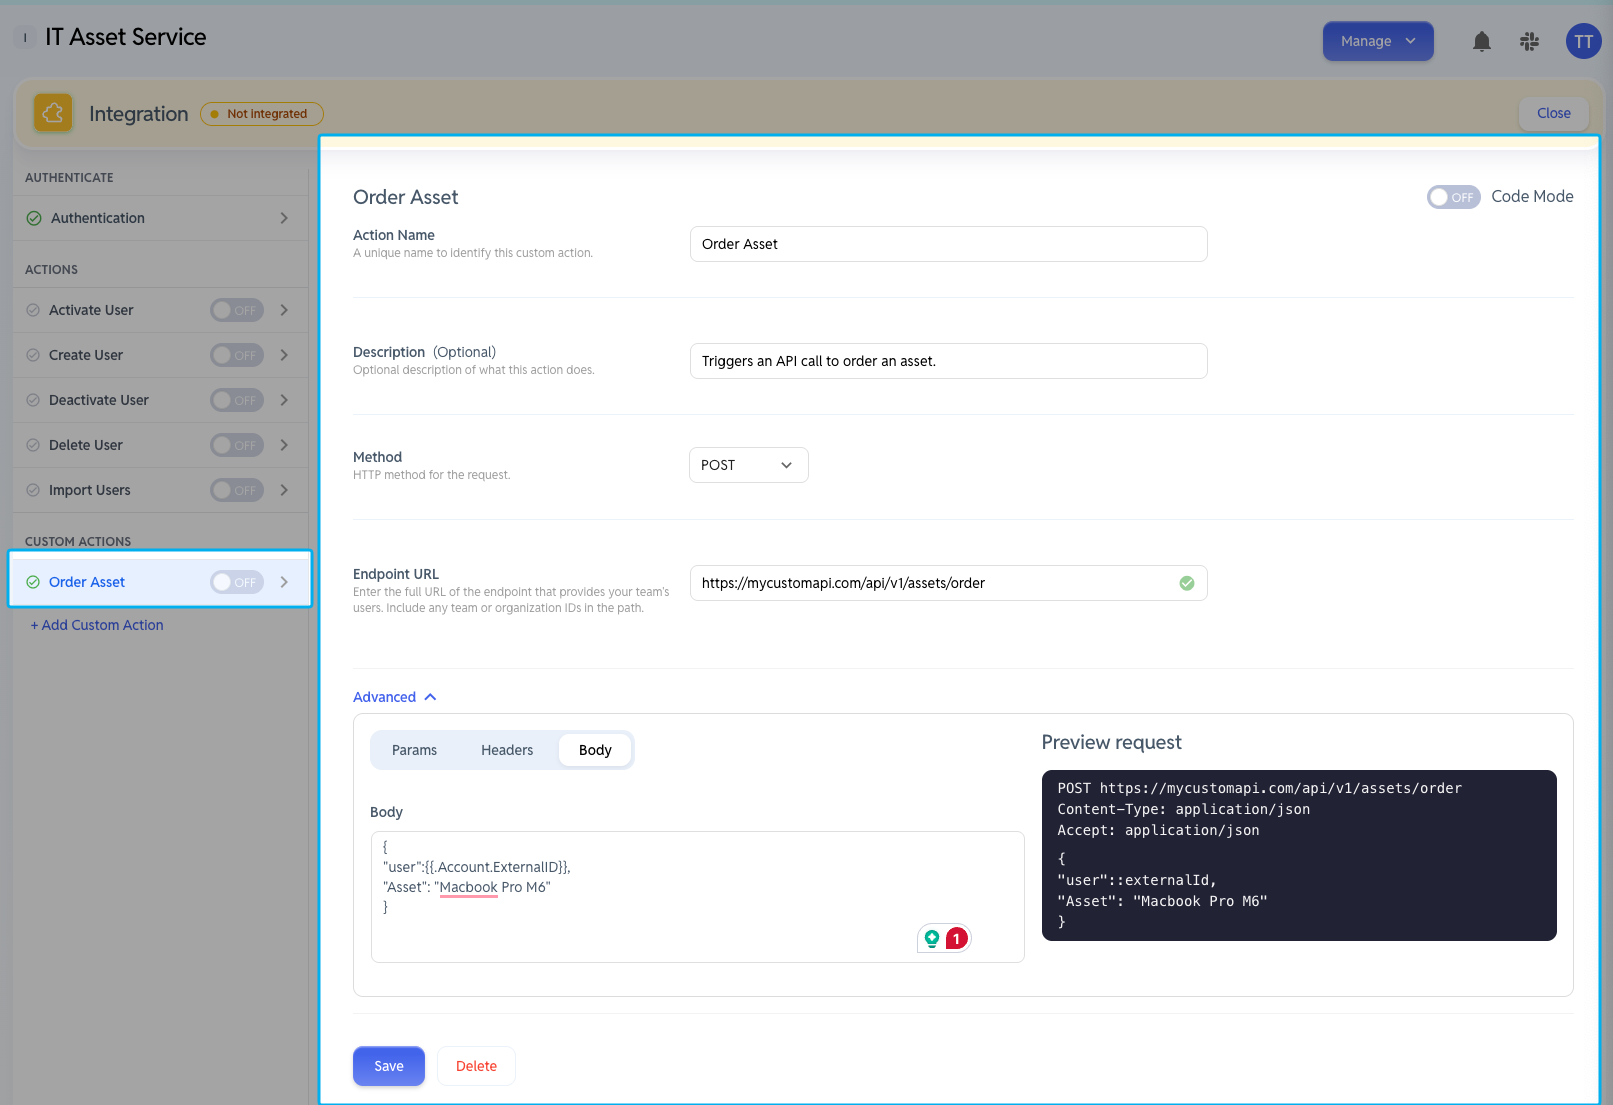
i.e. If using an I.T. Asset management application, you may want to automate to trigger an Order Asset endpoint. By using a Custom Action, you can execute custom actions as part of YeshID workflows.
This requires a YeshID Business plan.
In your application, "Add a custom action"
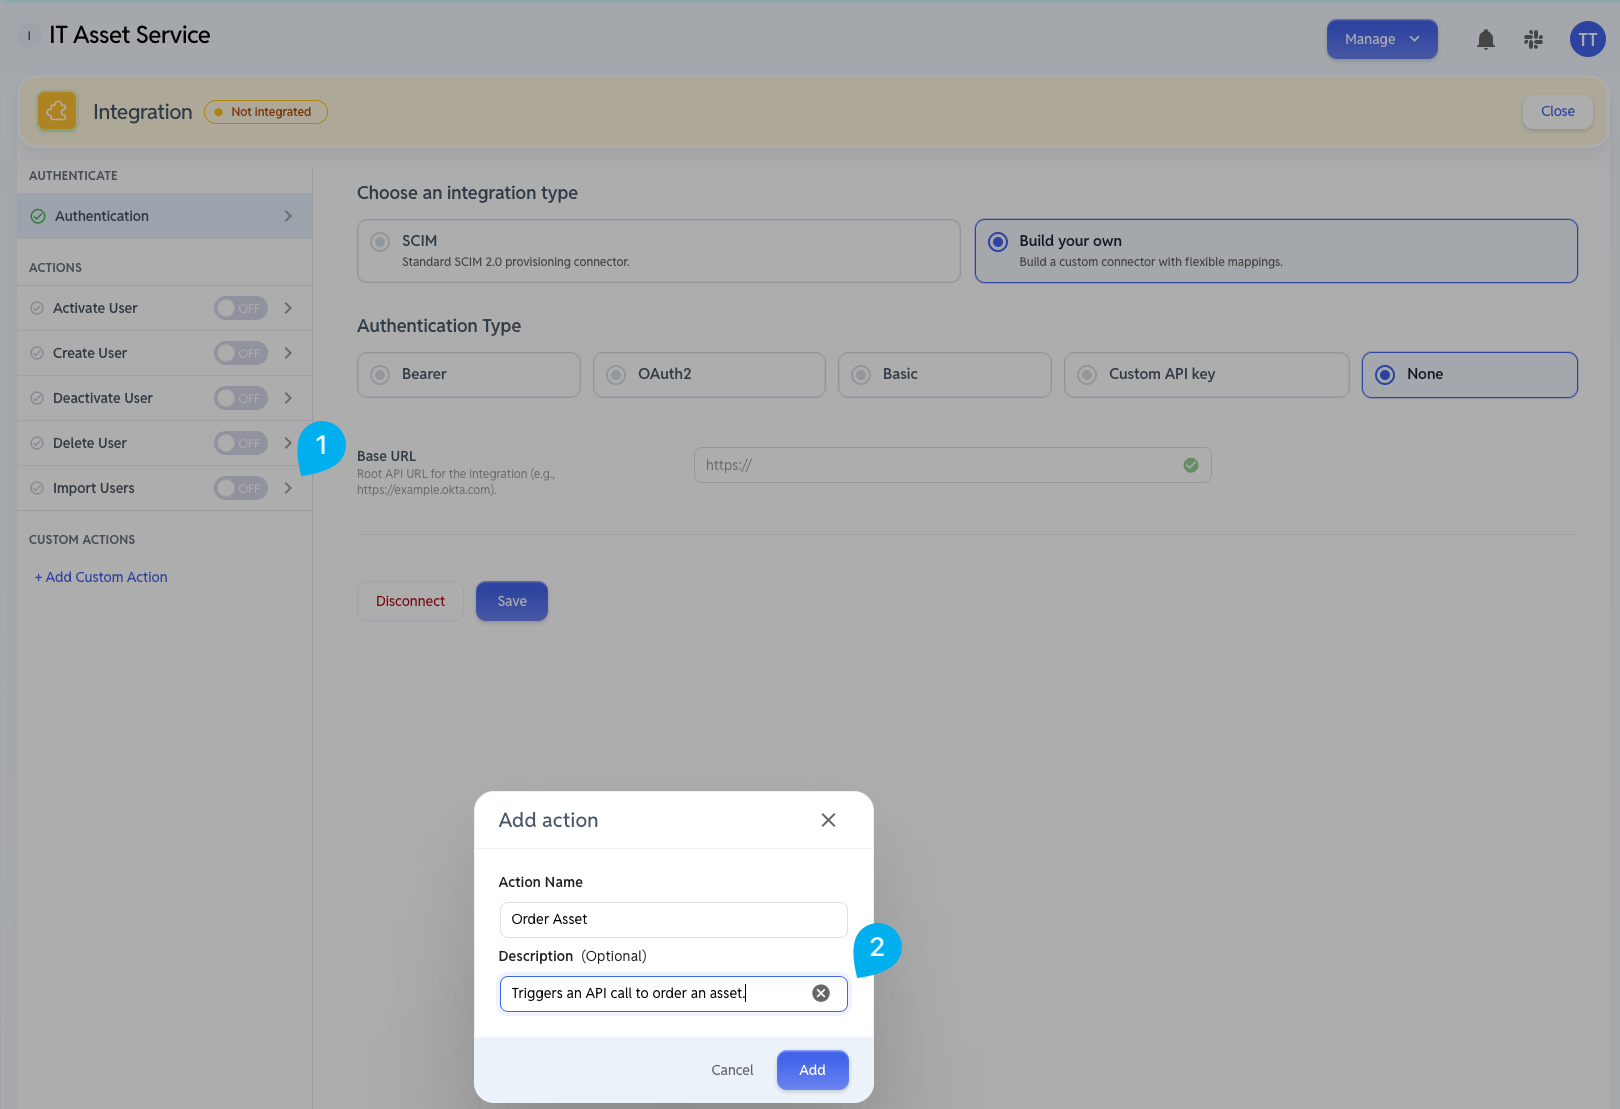
Configure your Custom Action (same as above)
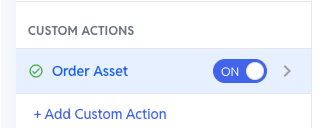
Enable Action
In your YeshID Workflow, click
/Run provisioner action for user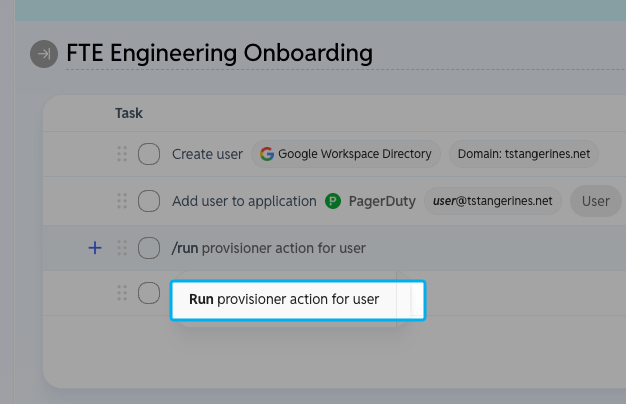
Expand task and (1) select application and (2) the custom action you created
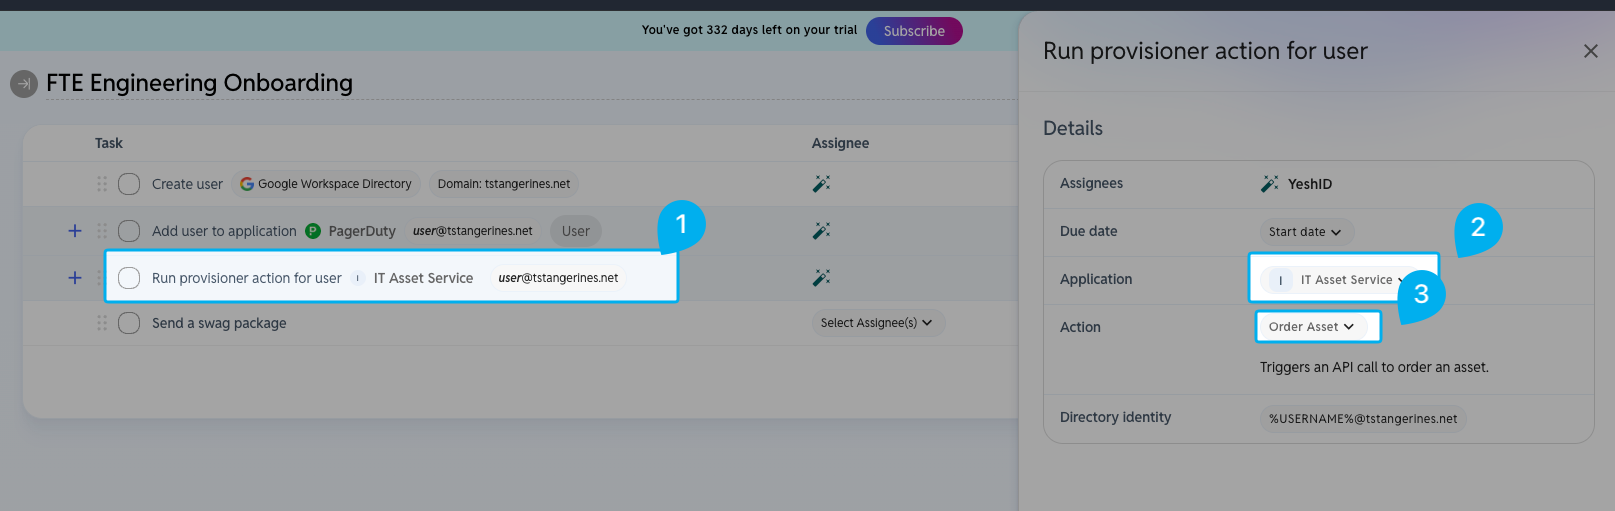
Congratulations! You can now trigger custom actions as part of YeshID workflows.