Connect & Integrate Grammarly [SCIM]
Last updated: October 21, 2025
Introduction
This guide covers how to connect and integrate with Grammarly. NOTE there are 2 steps (outlined in yellow) that could lead to an interruption in access to current users. Please reach out to support@yeshid.com if you run into any issues.
Pre-Requisites
Enable SSO in Grammarly with your Google Workspace https://support.grammarly.com/hc/en-us/articles/360051598552-Set-up-SSO-with-Google
Note - Grammarly docs state to do the following which will prevent users from logging in. (If you are okay with everyone in your organization logging into Grammarly, keep it on Turn ON for everyone)
In the User access tab, click OFF for everyone. Here, you can grant access to different user groups or organizational units in your company. First, for the successful SSO setup, we recommend assigning the user access to the specific Group within the organization that includes the administrator account. After the SSO is successfully activated in the Grammarly interface, you can switch this setting to Turn ON for everyone or keep using the user groups. For more information on user groups, please see this guide from Google.
This WILL block access to everyone minus the users that you pick
Steps
1. Obtain the SCIM token
Log into Grammarly > Admin Panel
Click into Provisioning in the side bar
Click Activate SCIM
Generate the SCIM token by clicking "Create Token"
Copy (and store) the token in a secure place.
Check "Enable Provisioning Features" box
Click "Configure API Integration"
Click "Enable API integration"
Enter the API token
Click "Test API Credentails"
Click Save
2. Set up the integration in YeshID
Note: If you already have users provisioned in Grammarly, you will need to re-provision them as per the grammarly docs:
If you already have team members in your Grammarly subscription and you turn on provisioning, a reconciliation process needs to happen. As part of this process, your identity provider will notify Grammarly of all assigned users. Grammarly will reconcile users already invited via a provisioning request from the identity provider and their status will be reflected on the Members page. To determine users who haven’t been reconciled with the identity provider, access the Provisioning page. If there are users who haven’t yet been provisioned by the identity provider, the Provisioning page will show a warning banner. Click the Download report link to download a CSV file containing the list of members that haven’t yet been provisioned. This report can be used to bulk delete outstanding users, if appropriate, or for manual processing.
This means that:
Once SSO is enabled (and only turned on for the users you specify), only those users will be provisioned.
You will need to "reconcile" by pulling a list of users that had access BEFORE switching to SSO/Provisioning on and adding them to the application in YeshID
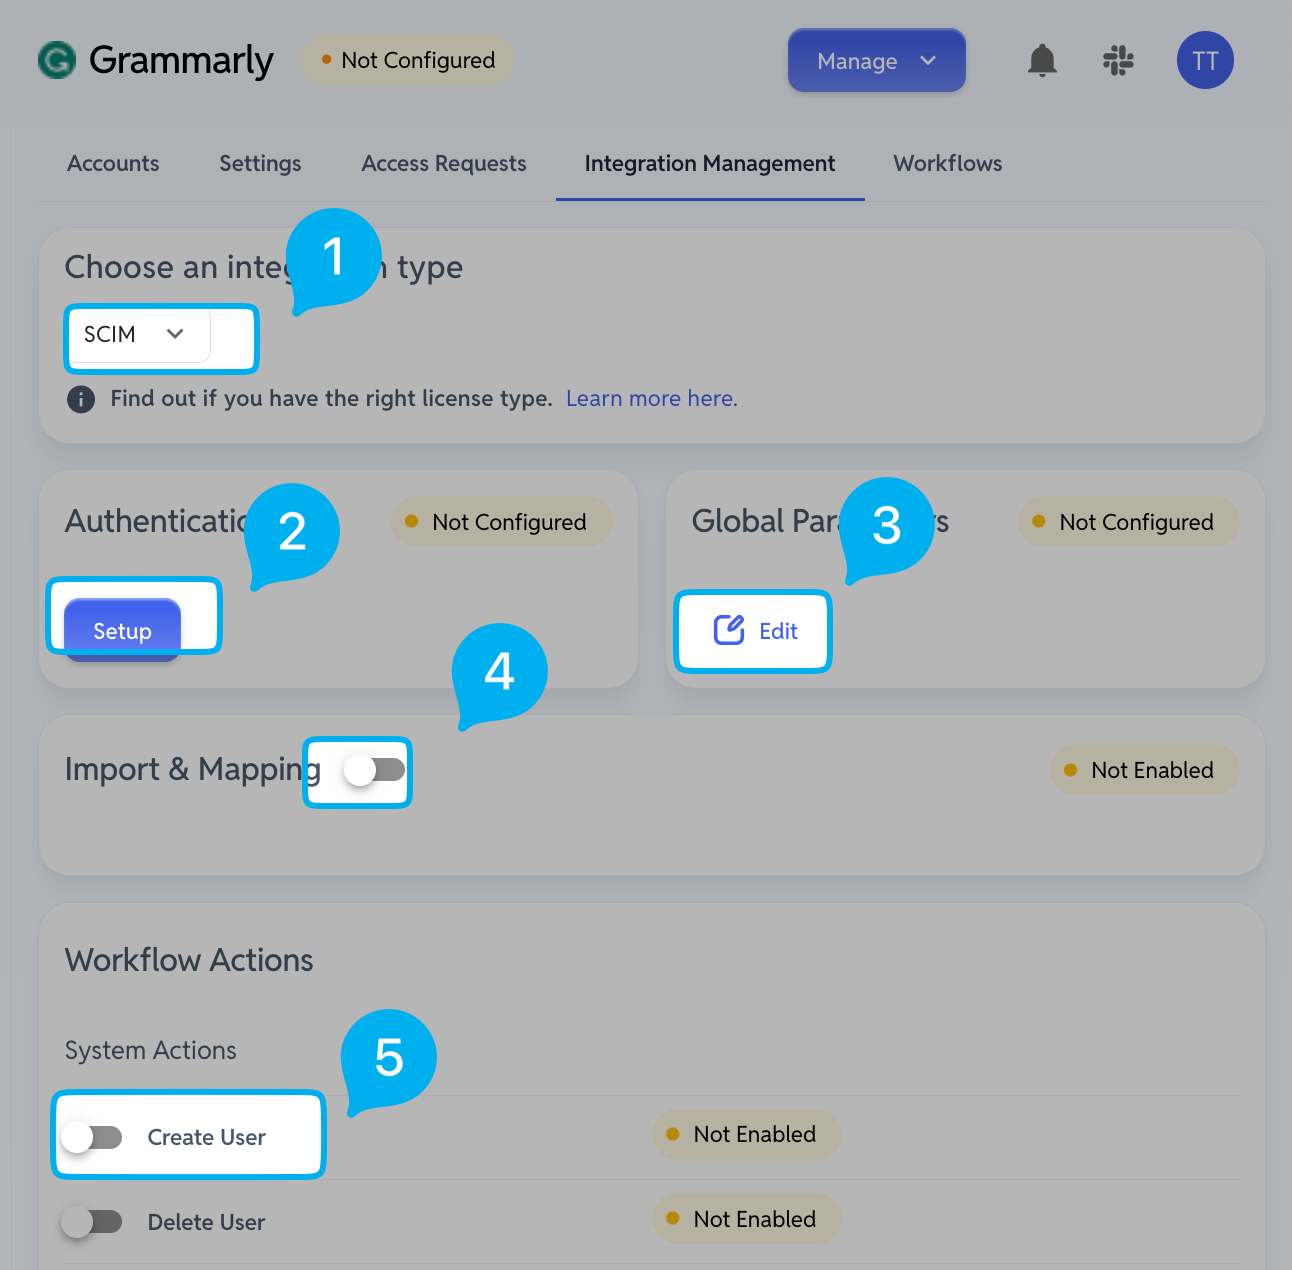
Change integration type to
SCIMClick
Authenticationand add in your SCIM token
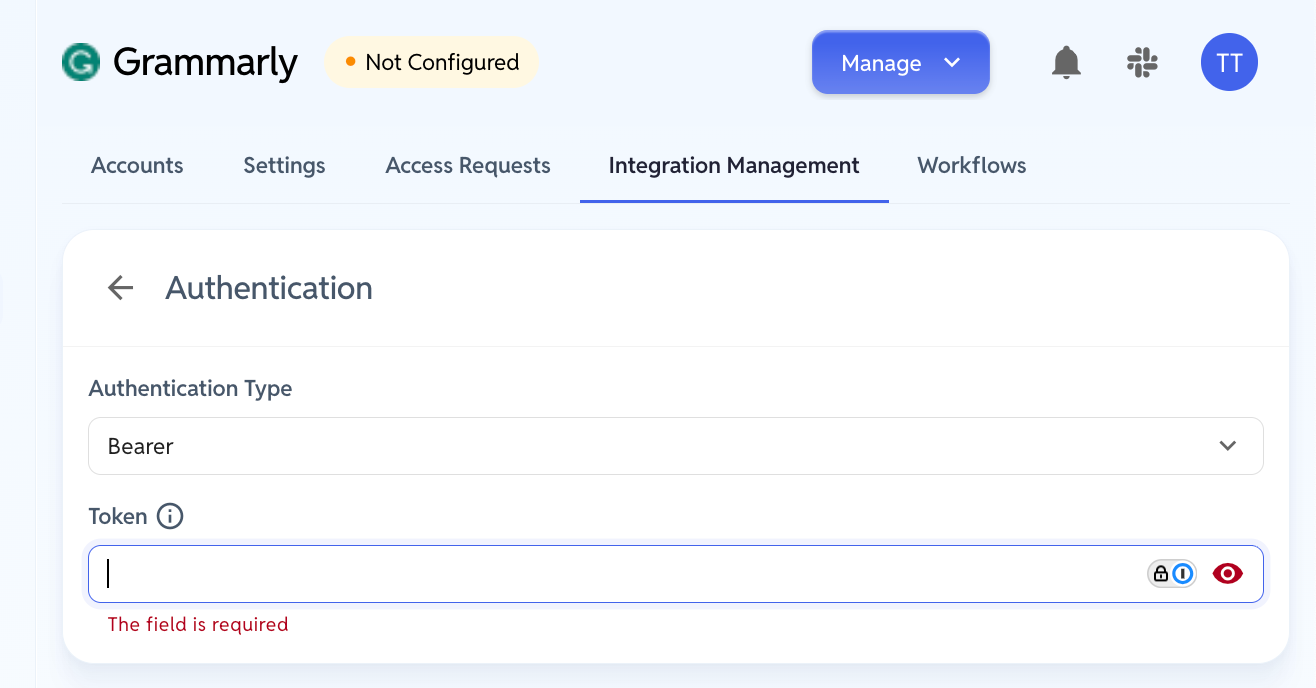
Click Global Parameters and add in the endpoint https://sso.grammarly.com/scim/v2
Click "Import & Mapping"
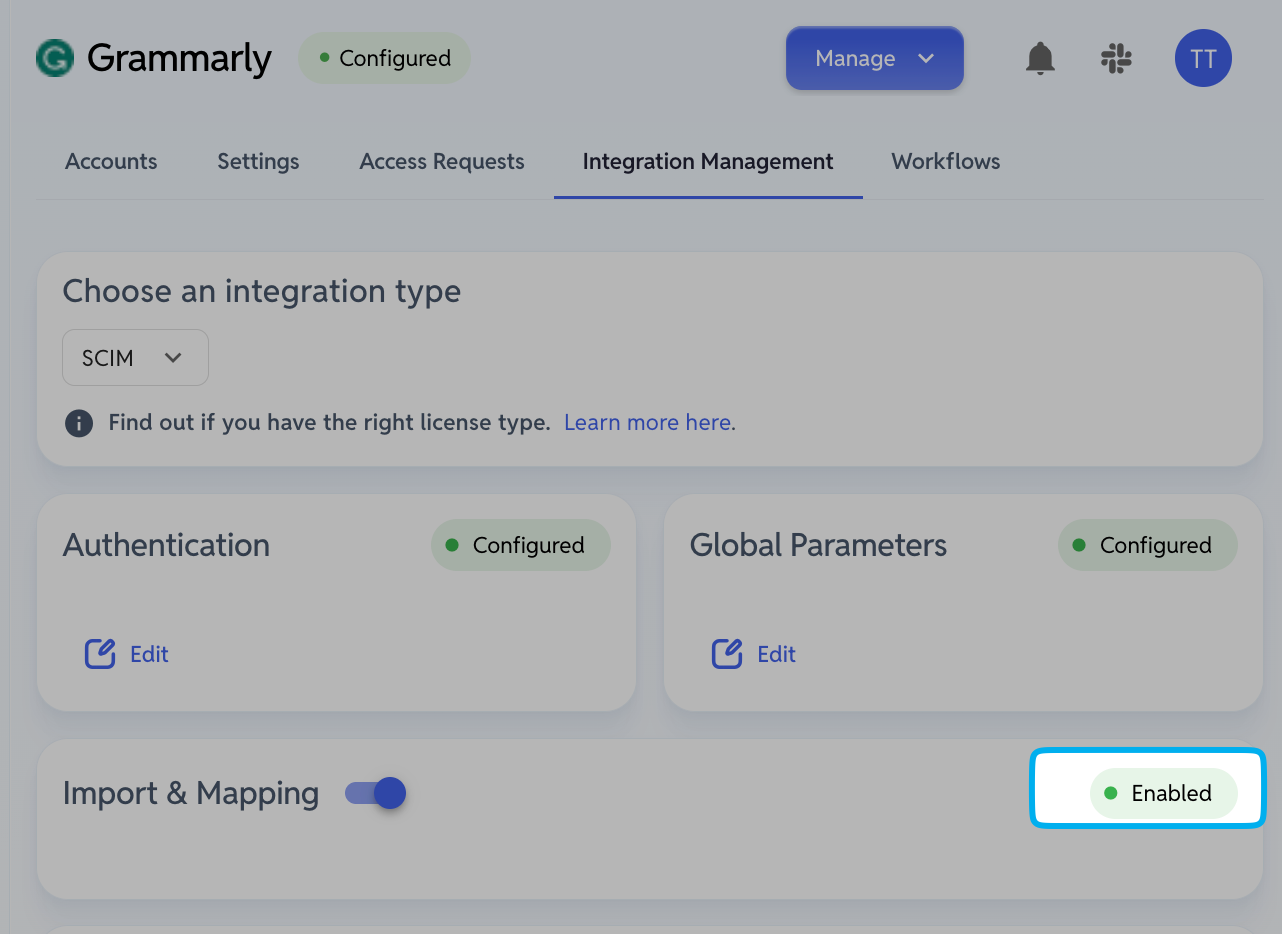
Hit "Save"
Click "Manage > Sync" - this may fail.
Re-provision all the existing users by checking off "Create"
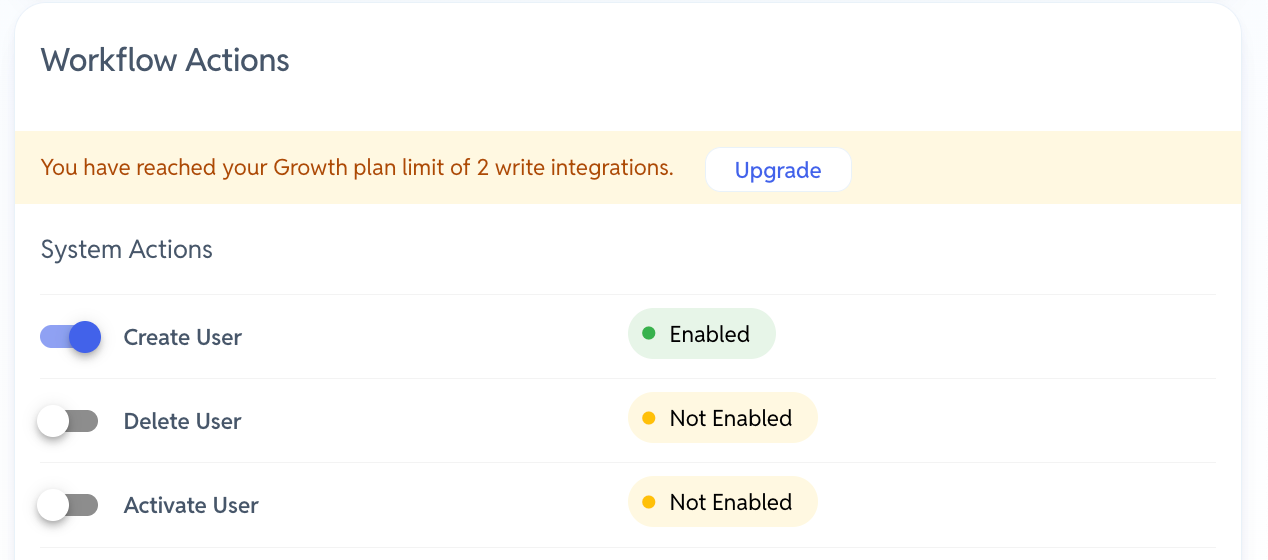
Click "Manage" > "Add User" and add all of your existing users (To resume access).